
Authentication Options
Please work with Naviga Support, or your Implementation resource if you are in a project, to get authentication details for your API.
There are a couple of options available for getting logged into the API. Naviga Personnel will help set the correct option for you.
API Key
Basic Authentication
OAuth 2.0
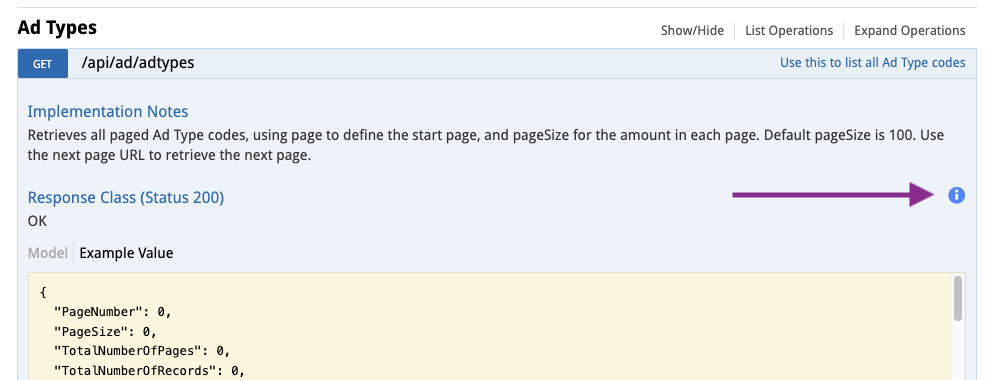
If you are using just an API Key, your Swagger page will look like this and Naviga Personnel will set the API Key for you:

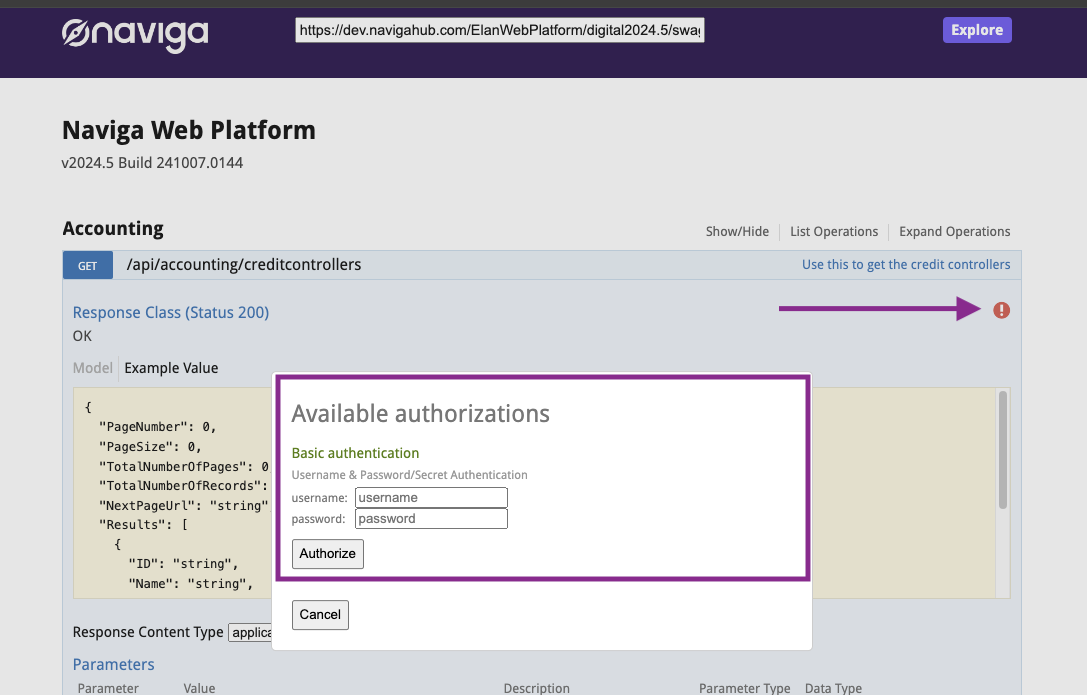
If you are using Basic Authentication, Naviga Personnel will share with you a page inside Naviga Ad where you can set up different API Users and get a secret key for each system that might be accessing your Naviga Ad platform API, so that you can manage access and disable access as needed for certain systems. Your swagger page will look like this with the simple API Key box hidden and instead the authentication is accessed via this red exclamation point shown below:
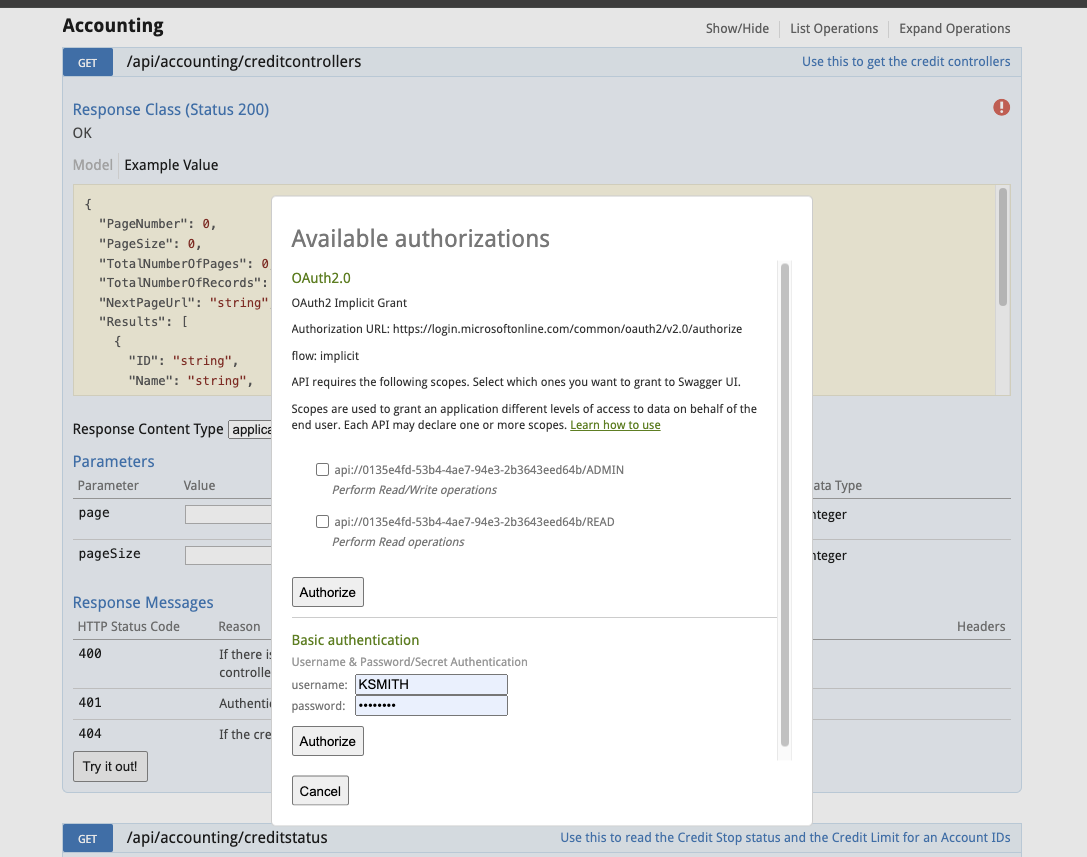
When OAuth 2.0 is enabled, this login popup will also include authentication button to go to your OAuth 2.0 provider like this (NOTE: This isn't an either/or option, Basic Auth can still be used):
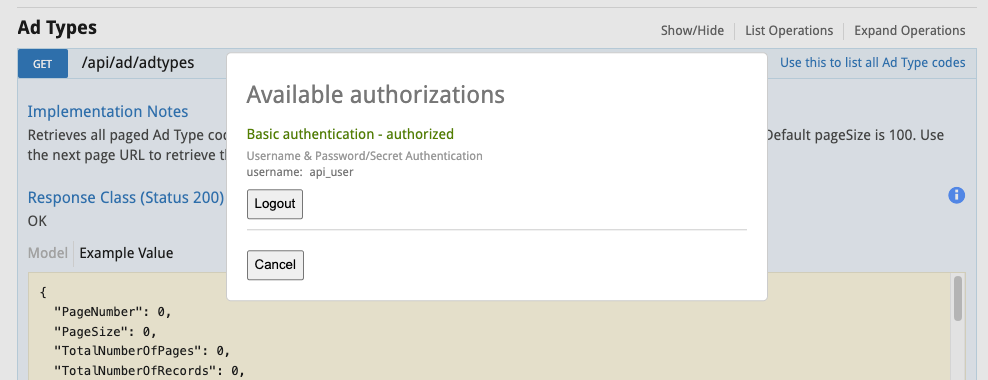
Once Authenticated, the red exclamation point will become blue so the user can visualize that they are authenticated. Successful authentication either via OAuth or Basic Auth will apply the blue dot to ALL of the methods which match the API user's rights to access/work the API. It only needs to be done once unless you need to auth for additional, lesser or expanded rights to the API method(s).:
Click on the blue exclamation again and they can log out
Note to Naviga Personnel - There are settings you must set on behalf of the customer in System Settings, under the Platform Authentication section. Please see internal docs for setup info. Changes to the Platform Authentication will not take effect immediately. It will take effect after the regular nightly processes run.
Setting up API User inside Naviga ad
Once Naviga Personnel shares the access screen, you can then setup any API users (and read only permissions if wanted).
Click the button in the top right to Create a new User. A popup window will display
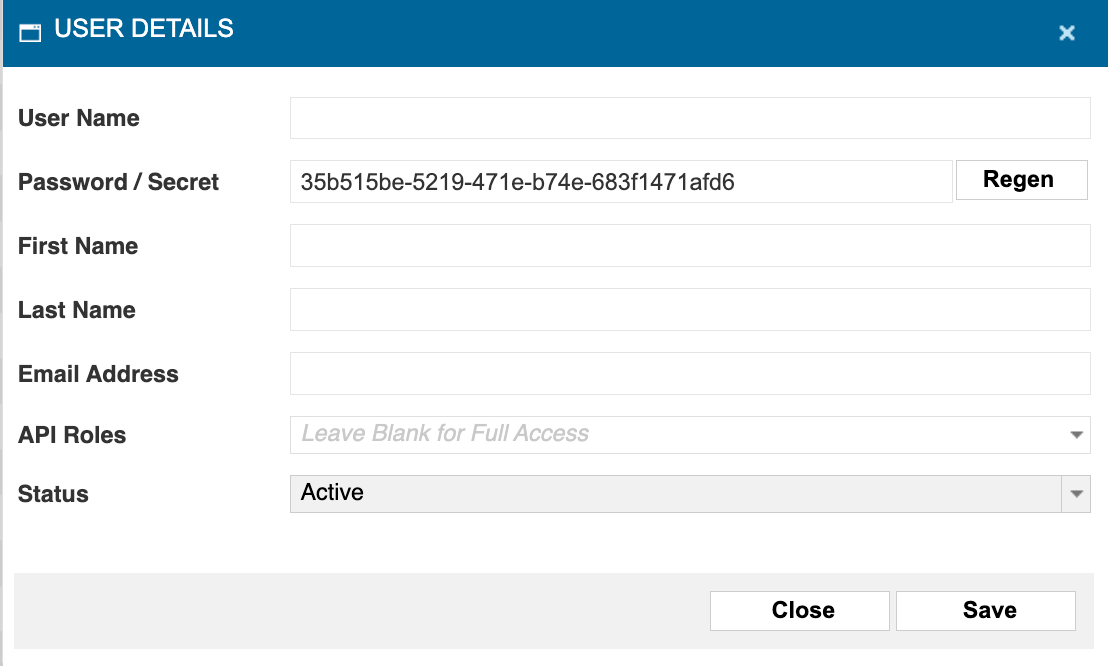
Enter the desired username, First Name, Last Name, email address and Roles.

An Admin can access all API Endpoints. (Note: If setting up the Client Portal User SSO Option - select "Admin" as the role.)
If the API User should only be allowed GET Permissions - check read
If they should be allowed Create and Updates - check write
Selecting multiple roles are typically unnecessary.

Users can create any API usernames as they need in test and production environments.
The "Token" in the above screenshot is an encoded string combining both the user and the password. It's useful for pasting into a single field in Postman or other tools.
If using the swagger page for testing, use the user name and the secret / password for the login. The secret can be accessed by clicking on the pencil icon. If a new secret is needed, it can be regenerated by clicking the Regen button.
Was this helpful?