
Naviga Plan View
Naviga Plan View
The Plan Viewer allows users who do not have access to Naviga Plan to be able to view a read-only preview of what the plan looks like. There are two varieties of the viewer: Plan Viewer and Plan View Web. The Plan Viewer is accessible inside Naviga Ad by licensed Naviga Ad users. Plan View Web is an optional Add-on module which allows users to log into a standalone application to view the plan. Plan Viewer Web would be appropriate for users who do not have a license to Naviga Ad OR Naviga Plan but have a need to see the plan.
The Plan Viewer looks like this inside Naviga Ad (screenshots with and without previews below):


Plan View Web
Plan View Web is accessed directly in a browser and requires additional license fees.
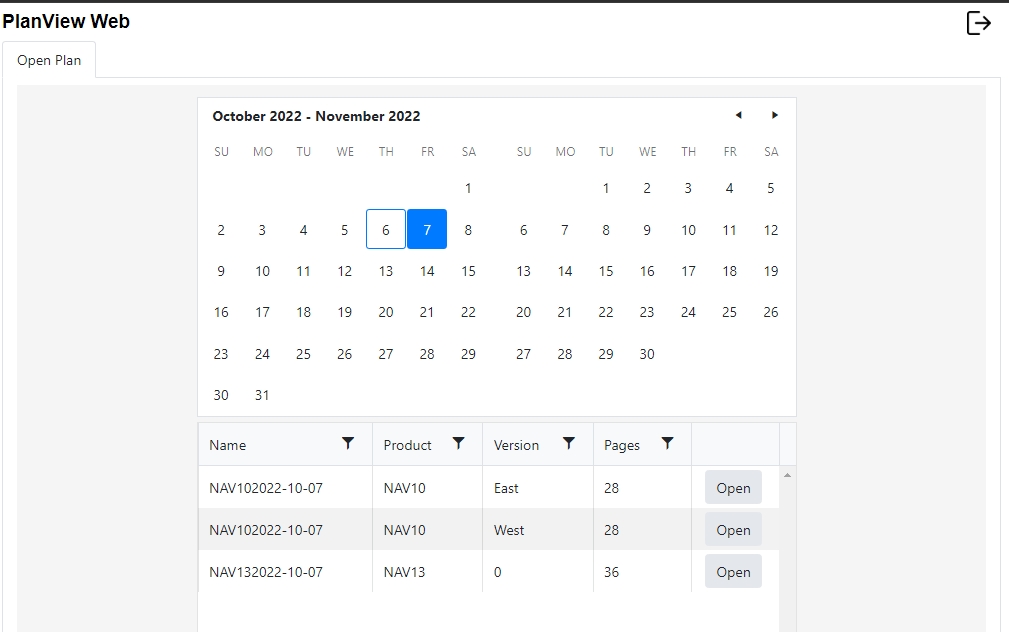
First you log in with a user / password set up in Naviga Plan. This user will not have a workspace, so he/she won’t be able to access plan itself, but the same user and password setup is also used for Plan View Web. Once logged in, the user will select the issue date and product they wish to view and click open:
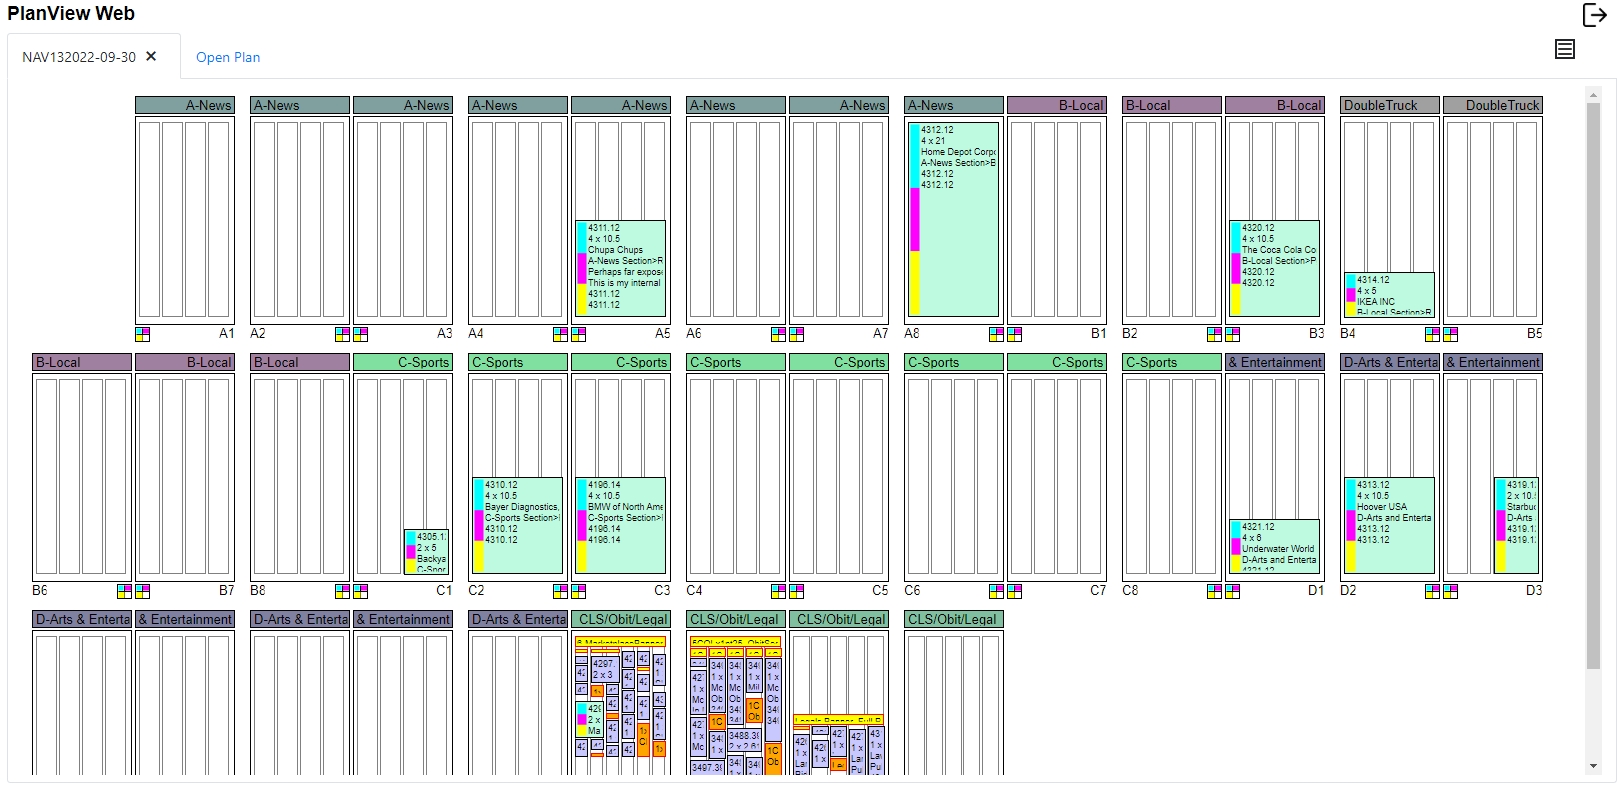
The plan is then displayed:
In the top right corner is a menu box that gives you some options:
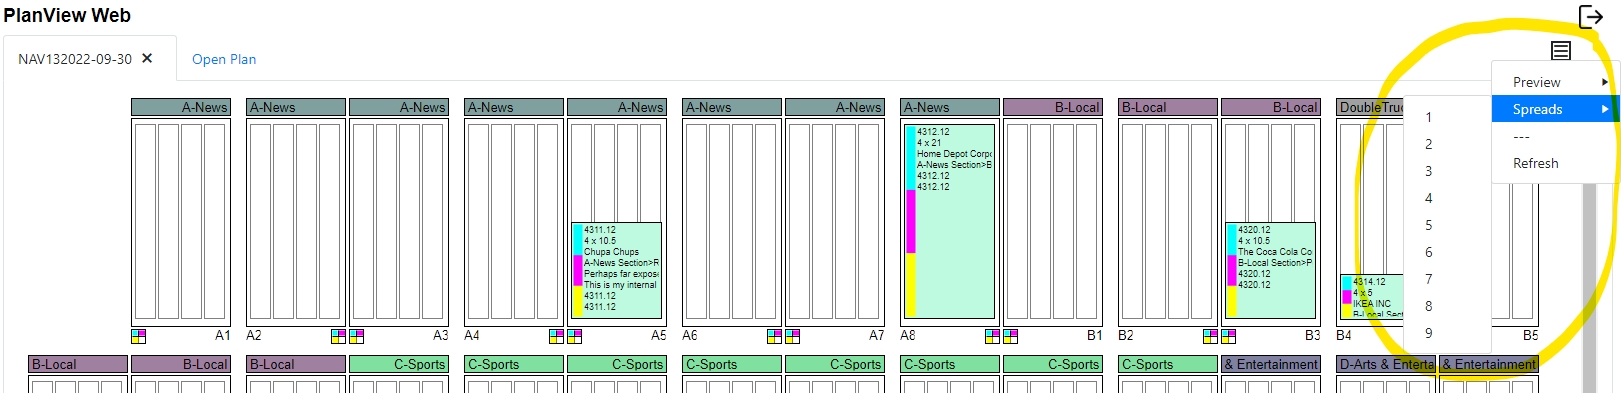
Preview can be on or off. Meaning you can see the space reservations, or you can see the actual material preview. And the spreads menu allows you to see between one- and nine-page pairs per row. In the screenshot above seven is selected, so we are seeing 7 pairs per row.
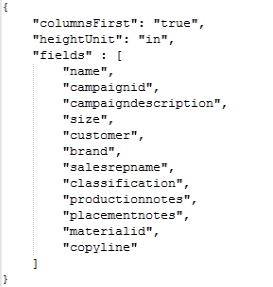
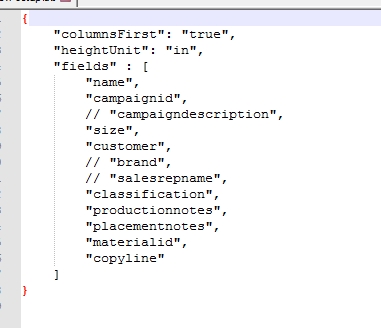
Naviga Implementation or Support resources will install Plan View upon request or Plan View Web if your contract allows for it. In the back end setup, there is a config file which controls the fields that are able to be seen and the order in which they are presented. These are currently the options available: Ad Name (This is the Naviga Ad Order ID (ie. 12345.1), Campaign ID, Campaign Description, Ad Size, Customer Name, Customer Brand, Sales Rep Name, Classification, Production Notes, Placement Notes, Material ID, and Copyline.
For Naviga Implementation & Support:
This is what the config file should look like:
If there are any lines that the client doesn’t want, you can comment them out like this:
The height can be displayed in a variety of measurements:
POINTS ("pt"),
INCHES ("in"),
MILLIMETERS ("mm"),
CENTIMETERS (“cm"),
DIDOTS ("di"),
CICEROS ("ci"),
PICAS ("pi"),
AGATE ("ag");
For Naviga Implementation & Support: this is what the root path should look like in Naviga Ad Admin Setup:
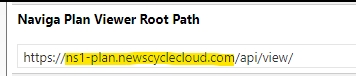
The highlighted part will be given to you by hosting. You will need to send them the IP based URL, and they will turn it into a publicly facing URL like above. Make sure it is https when you paste it into setup.
Last updated
Was this helpful?