
Installing Planflow (InDesign Script)
When running in the Naviga Cloud, we will install this for you on your workspace. Occasionally, sites will actually run Planflow locally instead. For those situations, here are the instructions to install this yourselves.
Installing Indesign Script - Mac
Unzip NavigaPlanFlowInstall.zip.
Open the un-zipped NavigaPlanFlowInstall folder and then the Files folder. (Ignore the bat file – that is the installer for Windows)
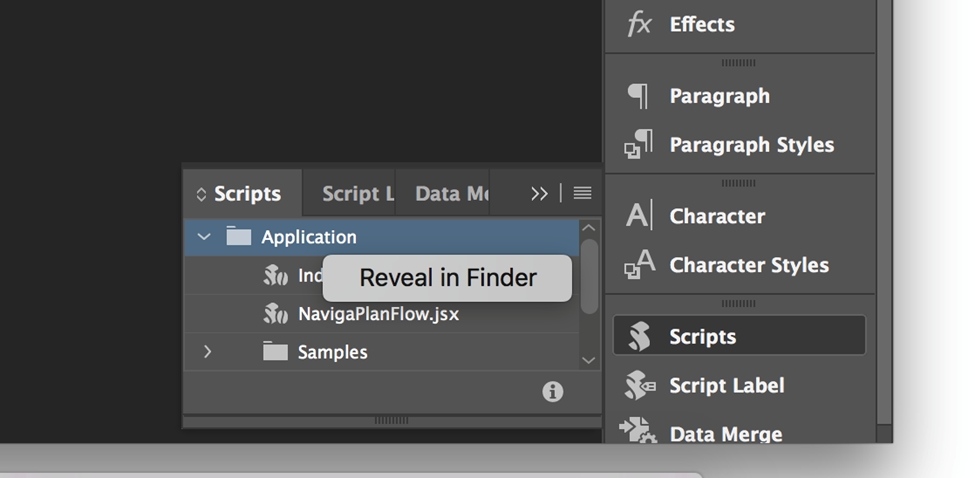
In your InDesign Scripts folder, create a folder named NavigaPlan If you don’t know where that is, you can find your scripts folder by opening InDesign, opening the scripts panel (Window > Utilities > Script) Right click on Application and choose Reveal in Finder.
Copy all files in NavigaPlanFlowInstall/Files into Scripts/NavigaPlan Your Scripts folder will look something like this. The blue highlighted folders below are the important ones for this install.
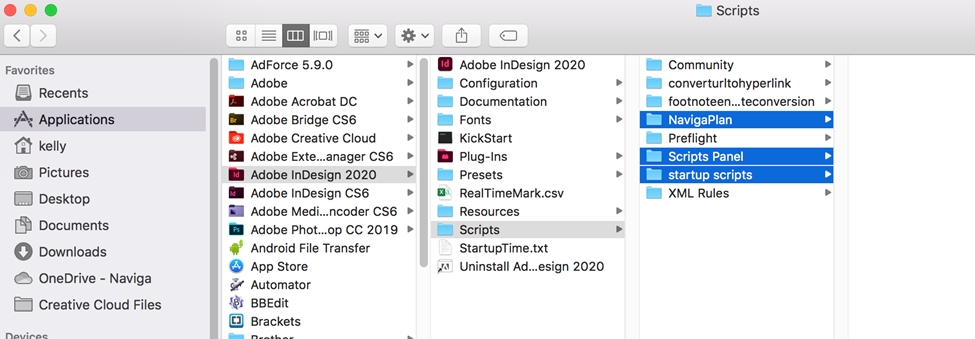
After you have copied the files into NavigaPlan folder. Find and copy these two files in the NavigaPlan folder… NavigaPlanFlow.jsx and NavigaPlanFlowMenuStartup.jsx Copy Scripts/NavigaPlan/NavigaPlanFlow.jsx to Scripts/Scripts Panel/ Copy Scripts/NavigaPlan/NavigaPlanFlowMenuStartup.jsx to Scripts/Startup Scripts/
Open (or Restart) InDesign
Once installed, you can launch the script from the scripts panel, or from Help > NavigaPlanFlow.
You will see the below window. Click “Choose” and navigate to the XML file that plan has output. It will look like this once selected:
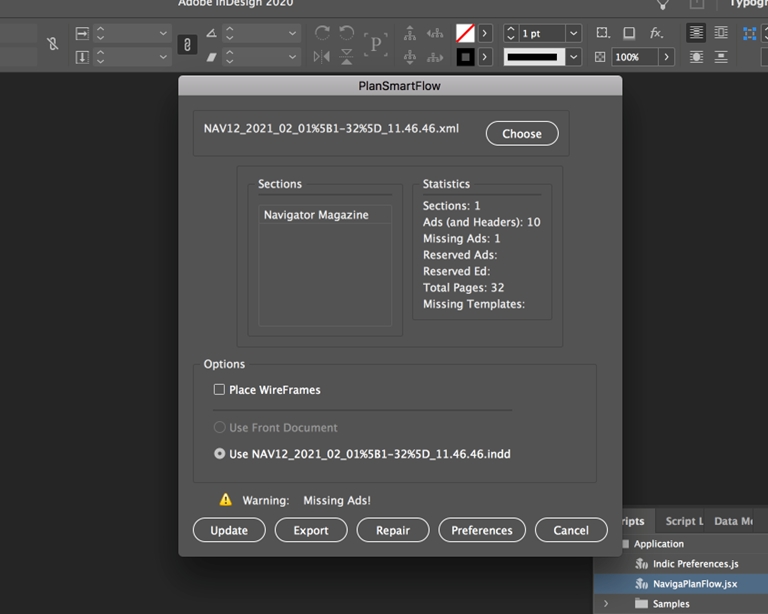
In the statistics, you will see if you are missing any ads or templates.
In the options, select “Place wireframes” if you would like images boxes placed where the ads will go (faster). Uncheck “Place Wireframes to bring in the actual ads.
Select “use front document” to import the ads into the opened document in Indesign. Select second option to use the template to create a new INDD document and place the ads in it.
Was this helpful?