
Preferences
In the browser version, preferences are available here on the initial launch screen. Options are similar to the Client version. These preferences are designated for your Plan user, so each user will need to set them for him/herself. If you already set them up in the client application, they will be already set here in the browser.
Select from the following options:
Units
In the popup, select Locale & Units.

In the depth and width boxes, select desired units for viewing sizes in the system. The following options are available:

InDesign language can be left blank. It can optionally be used with the InDesign script output
Click OK.
Options
Select Options.

The Preferences Options panel
Size Order Dropdown
Options include Show Width First or Depth First. An Ad that is two columns wide by 5 inches deep will display as 2x5 if the width is first. It will display as 5x2 if depth is first.
Warning on Unplaced ads
If checked, when you close a plan, you will be given the number of unplaced ads.
Warning for Color ads page mismatch
If checked, a warning will display if a color ad is placed on a B&W page (or a 4-color ad is placed on a spot-color page)
Show Page Color
To always show the color boxes at the bottom left of the page, even if no color is on the page, set this to yes. To only show the boxes when color is present, uncheck it.

Logging
Select the logging level for the log file stored on the robot server. (PlanWeb/Log folder). It is recommended that this is kept at 'Normal' unless actively testing something.
Planning
Set desired preferences according to the descriptions above.
Click OK.
Outlines
You can designate what information you want to appear in each outline type and the order in which it appears.

In the popup, select Outlines
In the Type dropdown, select the type of ad or page furniture for which you want to set display options. Types are as follows:

To move an unused option to the used column, simply select it, and then drag/drop to the right column. Perform the reverse to move it back to the unused column Note: To enable Plan users to see info in plain text on the preferred position for each ad, include Preferred Verbose in the Display Order list. To include this info as codes, include Preferred Short.
To arrange the order in which you want the information to appear, select an option and drag it up or down in the list.
If desired, repeat for other types of ads.
Click OK.
The selected the information will appear on the ads or ad furniture in the Plan.
GUI Settings
In the popup, select GUI Settings

NOT YET FUNCTIONAL IN THE BROWSER so it is grayed out in the preferences - Select “show ad list grid” and the ad list will appear with subtle lines between fields to make it easier to read. How subtle those lines are is very dependent on the contrast setting on your monitor, so we have also allowed for you to select the color you would like for the grid outline. In the screenshot above, a blue-green
Dark Mode - User can opt to view in dark mode and the pages will appear as shown below. The plans will have a darker background and the ad shades will be darker as well.

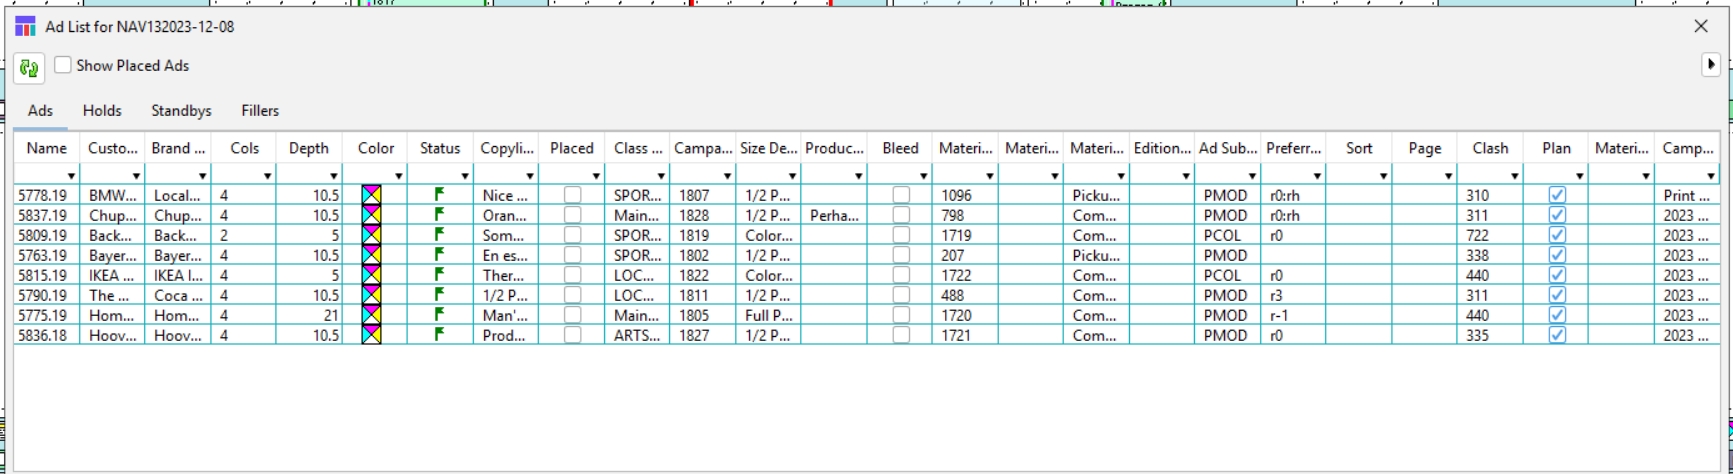
 Ad List in Dark mode (note the unplaced ad has a selection arrow that is light, while the placed ad selector is muted and cannot be used to drag and drop (since the ad is already in the plan):

NOT YET FUNCTIONAL IN THE BROWSER so it is grayed out in the preferences - Enter desired font size for the Outline info on ads. (Note: If you set this number too large, it may be difficult to read it for 1 column ads unless you are viewing the page with only one spread at a time)
You can select the background color for Naviga Plan. Click on the color box and a dialog will open to allow you to select your color. Choose color by dragging and dropping from the rainbow color bar and then click on the shade desired in the large square color box. Can also use the RBG numbers if you know the exact hue desired. Pro tip for users that have separate test and production environments – Choose one color for your test system and another color for live. Then you will always know which system you are in!

Click OK to save.
Users / Passwords
This tab will only be seen in Aurora databases. If you are an NCS Content user, and therefore on Oracle, you will continue to create new users and manage passwords in the NCS Content System.
For non-NCS Content users, this is a place where admins will create new plan web users. Everyone can change their own passwords here but only someone with admin role can reset other peoples passwords. If you can see all users & passwords – congrats, you’re an admin!
For a non-admin user, the tab will look like this, where they can only reset their own password:

For an admin, it will look like this:

Admins can reset a password for a user, they can set up new users, enable/disable users, and set/change their roles.
Last updated
Was this helpful?