
Working with Fillers
Library filler list
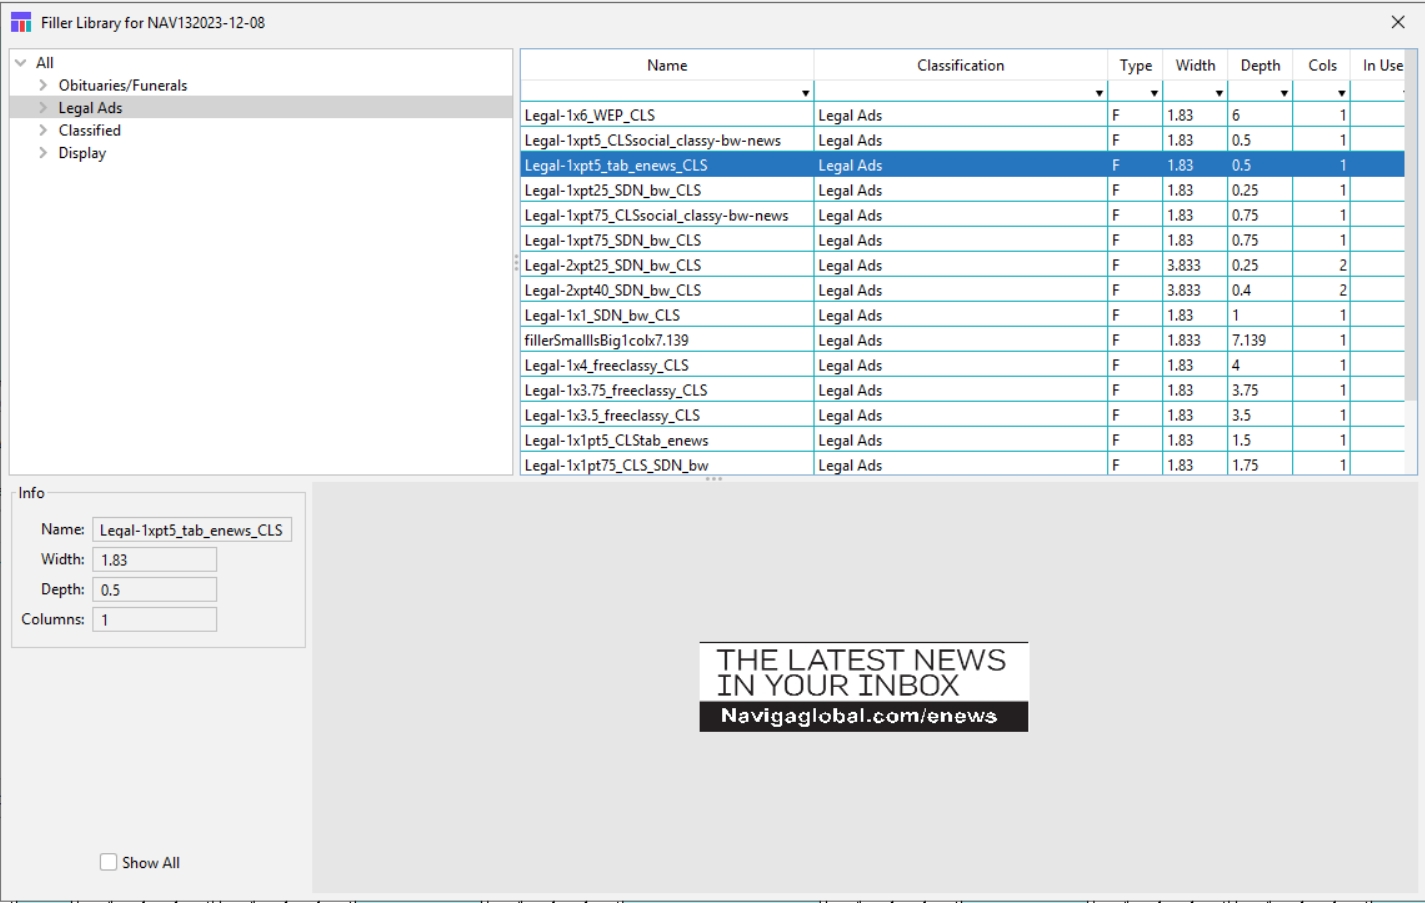
In the Plan menu, choose Fillers -> Library Filler List. The library fillers list displays like this:
Unlike the Fillers Panel in the Ad List, these columns are not configurable by an admin in plan setup.
By default, you will see only fillers in this view. Click Show all checkbox at the bottom left to also see banners and headers. Select the category at the top to select which category you wish to see furniture for. The columns can be sorted by double clicking on the header. There is only one sort in here, so clicking on an additional column will sort by that column instead. Note that the very top row in the grid allows for filtering.
The fields displayed here are as follows:
Name – the file name of the filler
Type – the Type of page furniture that it is
F=Filler
B=Banner
M=Major Header
H=Minor Header
Width – Width of the Filler (shown in the units defined in Preferences)
Depth – Depth of the Filler (shown in the units defined in Preferences)
Columns – Width of the Filler in columns
Ad ID – ID of the creative
In Use - Number of times in the open plan that that item has been placed on a page.
Select a filler to see a preview in the preview pane
To place on a page select the filler from the list and drag it and drop it onto the page in the plan.
Note: To exchange or remove fillers, see Working with fillers
Exchanging fillers
You can exchange a filler for another filler on the layout.
On the plan layout, select the filler you want to exchange.
Do one of the following:
In the Plan menu, choose Fillers -> Exchange.
Press Alt-E (Windows) or Option-E (MacOS). The Exchange Filler dialog box opens.
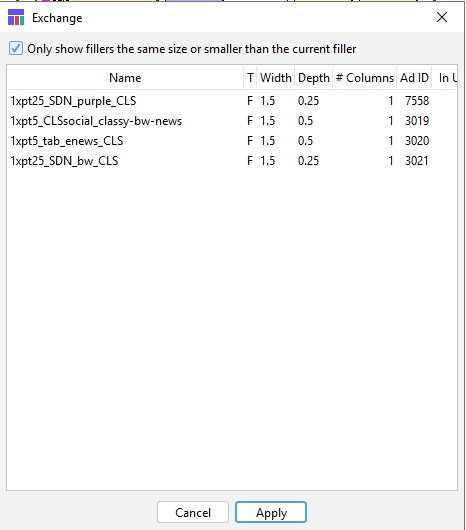
To see a list of only fillers that are the same size or smaller than the selected filler, check the check box.
You can rearrange the column order by clicking and dragging the column headers.
You can re-sort the Filler list by double-clicking a column header. The list is sorted in ascending alphanumeric order.
Do one of the following:
Select the replacement filler and click Open.
Double-click on the replacement filler.
The Exchange Filler dialog box closes. The filler has been exchanged.
Removing fillers
You can remove fillers and recover the space they occupy.
To remove several fillers at once
In the Plan, select a range of fillers or one or more pages from which you want to remove fillers.
In the Plan menu, choose Planning -> Unfill.
An additional menu opens. Choose one of the following:
Up
On the selected page all fillers are removed, and the ads reclaim the space and move up toward the top of the page
Down
On the selected page all fillers are removed, and the ads reclaim the space and move down to the bottom of the page.
The fillers are removed.
To remove one or more fillers at a time
In the Plan, select one or more fillers.
Do one of the following:
Choose Edit -> Unplan.
Press Backspace (Windows) or delete (Mac OS).
Right-click (Windows) or Ctrl-Click (Mac OS) one of the selected fillers and choose Unplan. The Unplan dialog box opens.
 The dialog box refers to all selected fillers as “ads.” If you have selected more than one filler, the dialog box asks if you want to unplan the number of fillers you selected.
Do one of the following:
Click Unplan. Naviga Plan removes the selected fillers from the plan. Fillers, banners and headers remain in the Fillers list, ready to be planned again.
To cancel the removal, click Cancel.
Click Unplan & Disable. The selected fillers are removed from the plan. Fillers, banners and headers remain in the Fillers list. Fillers and banners can be planned manually.
Was this helpful?