
Planning Ads
In Naviga Plan, you can place ads on pages automatically or manually. You can also arrange ads on pages automatically or manually.
Note: You can pre-plan classified display ads and plan classified liners later to include last-minute liners.
Planning ads automatically
You can place ads in the plan automatically if the classifications have been assigned to the pages.
First, plan any ads you want to plan manually and lock them in place. See Planning ads manually.
Do one of the following:
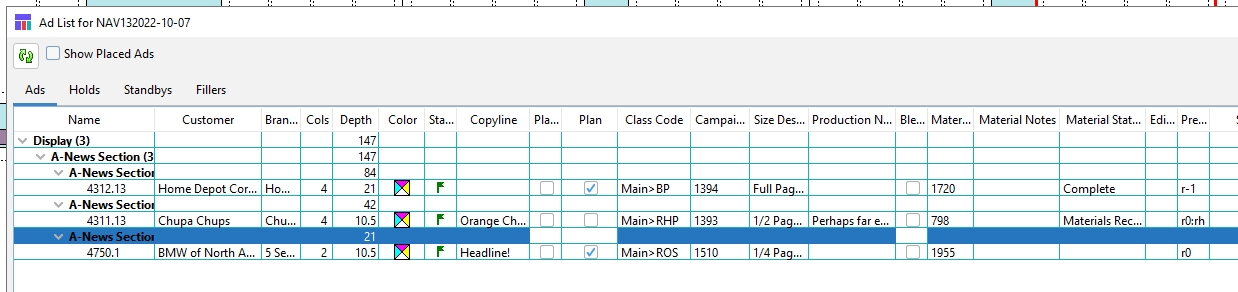
Select the ads from the list in the Ad List dialog box.
From the Ad List dialog box menu, choose Place.
The selected ads are planned according to the pages’ classification assignments.
To automatically plan by classifications:
If you want to plan specific pages, select them.
In the Plan menu, choose Planning -> Plan. The Plan menu opens.
Do one of the following:
Choose Page to place ads on the selected pages according to the pages’ classification assignments.
Choose All to place ads on all pages according to each page’s classifications or press Ctrl+Alt-L (Windows) or Command+Option-L (Mac OS).
From the Flow Set list, choose a flow set or press Alt-1 and so forth (Windows) or Option-1 and so forth (Mac OS). Note: Flow sets are stored for each user and are not available to other users. When you select pages and apply a flow set, it has priority over the plan’s running orders on those pages.
From the Sections list, choose a section to place ads on all pages that have been assigned the section or lower classification levels within the section.
Note: If an ad can’t be placed in its designated preferred position, the system will show an error that it failed to plan and provide the Ad ID.
To undo the planning, do one of the following:
Choose Edit -> Undo plan ads.
Press Ctrl-Z (Windows) or Command-Z (Mac OS).
Note: If you move automatically placed ads manually and decide you don’t like the changes, you can return to the original ad placement by repeating the automatic planning process.
Enable or disable ads from being planned automatically
You can designate ads or classifications of ads to be eligible to be planned automatically or to be locked from being planned automatically.
In the Ad List dialog box Ads panel, select ads or classifications that you want to be blocked or unblocked from being planned automatically.
In the Ad List dialog box menu, choose Set Plannable and do one of the following:
Click Enable to allow the selected ads and classifications to be planned automatically.
Click Disable to block the selected ads and classifications from being planned automatically.
If you choose to show the column “Plan” in the ad list, ads that are enabled as plannable will be checked. Ads that are disabled will be unchecked.
Planning an unplannable ad manually will enable it again for planning.
Planning ads manually
In the Ads list, look for ads that have their Placed boxes unchecked, or uncheck the Show Placed Ads check box to list only ads that have not been placed. One or more ad classification indicators appear.
In the Ads panel, click the Switch icon (
 ) to expand the list. The list expands to show all ads that have not been placed.
Drag each ad onto the plan. Note: The gap between ads is set in Naviga Plan Setup. Note: If you try to overlap ads—so that an ad tries to occupy any space already occupied by one or more planned ads—Plan will return the ad you are trying to place to the ad list if it cannot fit elsewhere on the page. If it can be placed on the same page, plan will place it. The ad is placed. The Placed check box is checked automatically in the Ad List if you have that as a visible column.
Rearrange the ads on each page by doing one of the following:
If you have set up Auto Plan for this type of ad, ads on each page are rearranged as the new ads are placed on the page. See Setting up Auto Plan.
If you have not set up Auto Plan for this type of ad, you can rearrange the ads automatically. See Planning ads automatically.
Rearrange the ads manually.
Planning Legal ads
You can book legal ads (or other long ads that you allow to split across columns) as single- or multi-column ads. The following characterize legal ads:
Legal ads are similar to other liner ads but are generally longer and are usually set to split or wrap from one column to the next.
Legal ads typically have their own running order level, so you can plan them separately from other types of ads.
Since legal ads can be split, you can use fillers with them.
Fillers do not automatically flow in between the segments of a split legal ad.
Note: You can force fillers to flow between segments of legal ads by selecting Random from the Justify Filler popup in your square off options. See Squaring off a group of ads.
If a planned legal ad splits and you move it later, the segments of the ad rejoin. To retain a split when you move an ad, press Ctrl+Alt (Windows) or Control+Option (Mac OS) and click the split ad.
You cannot move the segments of a split legal ad independently.
Note: Your system administrator sets the depth of the split segments of a legal ad in Plan Setup
To plan a legal ad
Note: You can drag and drop legal ads into a space big enough to accommodate the ad without splitting it. If the legal ad needs to split, plan it from the Plan menu or the Ad List menu. If the ad is too large, Naviga Plan does not plan the ad. You cannot manually place a split ad.
Open a plan. See To open/start a Plan.
Select the target page and do one of the following:
To plan your ad automatically by classification, select Planning > Plan and then select All or LEGALS from the Plan menu. See Planning ads automatically.
To plan your ad manually, choose Window -> Ad List to open the Ad List dialog box. Select the ad and place or drag and drop it on the page. Note: If you drag and drop an ad from the Ad List, the ad will not split.
To move a legal ad from one page to another, click the ad and drag and drop it on the new page. Note: You can only move one split ad at a time. You cannot drag and drop several at once.
Sometimes (often during an autoflow) a legal ad splits improperly around another ad so that its segments are not contiguous. To see bad splits in the plan easily, check the View -> Show -> Bad Splits check box. The improperly split segments turn red.
To fix bad splits, do one of the following:
To unsplit the ad, drag it to a large enough space to accommodate the entire unsplit ad. The segments of the split ad rejoin.
When you move a bad-split ad, it may retain the red, bad-split color, even after the ad unsplits or splits properly.
If you replan the ad, the page, or the plan, the ad may split correctly.
To move a legal ad from one page to another:
Unplan the ad.
Lock the pages ahead of the target page.
Replan the ad.
(Optional) Square off your legal ads. See Squaring off a group of ads.
Note: Since legal ads can split, Naviga recommends that you square them off manually rather than automatically.
Setting up Auto Plan
If Auto Plan is enabled, whenever you move any element on a page Auto Plan automatically replans the liners and display ads on the page, depending on the settings. It does not replan the element you moved, nor any locked ads.
Note: Auto Plan may affect ads on other pages. If you have Auto Plan enabled, whenever you are finished planning a page, you should lock it to prevent Auto Planning from affecting it.
To set up Auto Plan
In the Plan menu, choose Planning -> Auto Plan.
An additional menu opens. Check one of the following:
Off
No ads will be automatically rearranged.
Liners
Liners will be automatically rearranged.
All
All ads (classified and display) will be automatically rear‐ ranged.
Unplanning plans, pages, and sections
You can unplan a plan, selected pages, or selected sections, reverting to the way they were before you made changes to them. This unplaces any placed ads.
Important: You cannot unplan locked ads. Unlock them first.
To unplan ads automatically
If you want to unplan specific pages, select them.
In the Plan menu, choose Planning -> Unplan. The Unplan menu opens. The following options are available:
Page
Use to unplan ads on the selected pages.
All
Use to unplan ads on all pages of the plan.
Flow Set list
List of flow sets you can use to unplan.
Alt+Shift‐1 and so forth
Option+Shift‐1 and so forth
Sections list
List of sections in the running order. Select the section for which to unplan ads on all pages.
Classified First‐ level Running order
List of first level running orders under the Classified classification. Select the first level running order for which to unplan ads on all pages.
Do one of the following:
Choose Page to unplan ads on the selected pages.
Choose All to unplan ads on all pages.
From the Flow Set list, choose a flow set or press Alt+Shift-1 and so forth (Windows) or Option+Shift-1 and so forth (Mac OS).
From the Sections list, choose a section to unplan ads on all pages that have been assigned the section or lower classification levels within the section.
From the Classified First-level Running Order list, choose a classification to unplan ads on all pages that have been assigned the classification or lower levels within the classification.
Unplanning selected items using the Edit menu
You can select one or more of any combination of ads, banners, headers, fillers, and reserved spaces, then unplan them. Unplanning affects the items as follows:
Banners, headers, and fillers remain in the Library Filler List, available to be planned again. As you unplan, you can decide whether they remain enabled (can be planned automatically), or disabled (cannot be planned automatically, until a user enables them).
Ads return to the Ads list. As you unplan, you can decide whether they remain enabled (can be planned automatically), or disabled (cannot be planned automatically, until a user enables them).
Reserved spaces are deleted.
Note: You cannot unplan locked items, or items placed on locked pages.
Note: You can’t disable headers. To prevent headers from planning when you plan liners, see Suppressing ad headers.
To unplan items using the Edit Menu
In the Plan, select the item or items.
Do one of the following:
Choose Edit -> Unplan.
Press Backspace (Windows) or delete (Mac OS).
Right-click (Windows) or Ctrl-Click (Mac OS) one of the selected items and choose Unplan. The Unplan dialog box opens.

The dialog box refers to all selected items as “ads.” If you have selected more than one item, the dialog box asks if you want to unplan the number of items you selected.
Do one of the following:
Click Unplan. Naviga Plan removes the selected items from the plan. Ads remain in the Ads list, ready to be planned again. Fillers, banners, and headers remain in the Library Filler list, ready to be planned again. Selected reserve spaces are deleted.
Click Unplan & Disable. The selected items are removed from the plan. Ads remain in the Ads list and cannot be planned automatically until they are enabled. Fillers, banners, and headers remain in the Library Filler list. Fillers and banners cannot be planned automatically until they are enabled. Selected reserve spaces are deleted.
Click Cancel to close the window without unplanning. Note: To enable disabled ads in the Ads list for automatic planning, see Using the Ads panel.
Last updated
Was this helpful?