
Fine-tuning the Layout
Squaring off a group of ads
You can square off a selected group of ads into a block.
Important: If you choose to square off a page of legal ads containing a segment of a legal ad that is continued from a previous page, the following applies:
You can square off only by Column (Auto and Depth will not work).
You can square off only in the top left of the page or the bottom left of the page (top right of the page and bottom right of the page do not work).
To square off ads
In the Plan, do one of the following:
Select a one or more ads you want to square off.
Select a page: All ads on the page will be squared off.
In the Plan menu, do one of the following:
Choose Planning -> Square Off.
Press Ctrl-H (Windows) or Command-H (Mac OS). The Square Off dialog box opens.

Square Off By
Select whether to square off the ads automatically, by columns, or by depth. Auto - Plan will decide what looks best Columns - the Columns field becomes enabled and the user can select how many columns to square off. Plan will square off to whatever depth it needs to accommodate that many columns. Depth - If a set depth is desired, enter the depth here and plan will use however many columns necessary to square off to that depth.
Where
Select whether to square off from:
the top left of the page
the top right of the page
the bottom left of the page
the bottom right of the page
the top left of the first selected ad.
Justify Fillers
Select how to justify fillers when squaring off:
Off–no fillers are added, just blank space
End of Column–fillers are added at the bottom of each column
Random–fillers are added anyplace in the columns
Columns
Enabled if “Column” is selected in the Square Off By dropdown menu. Enter the number of columns across which to square off the ads. Naviga Plan uses whatever depth is needed to accommodate all the ads selected. Plan will not do the square off if there aren’t enough ads to do it.
Depth
Enabled if “Depth” selected in the Square Off By popup. Enter the depth to square off the ads. Naviga Plan uses whatever number of columns is needed to accommodate all the ads selected. Plan will not do the square off if there aren’t enough ads to do it.
Make Block
Check this box to auto-create a "block" type reservation for the size of the square off. See Reserving Space section for more detials on the block reservation
Cancel button
Click to cancel and close the dialog box.
OK button
Click to square off the selected ads and close the dialog box.
From the Square Off By dropdown, select whether to square off automatically, by columns, or by depth from this popup. Note: If you choose to square off ads automatically, Naviga Plan attempts to square them off as best it can. Extremely long ads may not square off well. If you choose to square off by columns or depth and there aren’t enough ads to do it will, plan will not do it.
From the Where dropdown, select the point from which you want the square off to begin.
From the Justify Fillers dropdown, select the setting you want to use to justify fillers. The default is set to Off.
Do one of the following:
If you selected Columns, in the Columns text box enter the number of columns.
If you selected Depth, in the Depth text box enter the depth.
Click OK.
The selected ads are squared off.
Note: If you have locked an ad, the selected ads will flow around the locked ad when they are squared off.
Note: If you want an ad to start in a particular place on the page, you can use the reserve spaces feature to force the ad to begin where you designate. See To get information about reserved spaces.
Justifying ads
You can justify the alignment of a selected group of ads. Justification spreads the ads evenly across the designated range of ads by leaving equal space between the ads.
To justify ads
In the Plan, do one of the following:
Select a group of ads you want to justify.
Select a page; all ads on the page will be justified.
Select more than one page; all ads on the pages will be justified.
In the Plan menu, choose Planning -> Justify. An additional menu opens. The following options are available:
Up
Justifies the selected ads from the lowest selected ad up to the top of the page or the first unselected ad.
Ctrl‐U
Command‐ U
Down
Justifies the selected ads from the highest selected ad down to the bottom of the page or the first unselected ad.
Ctrl‐Y
Command‐ Y
Up and Down
Justifies the selected ads up to the top of the page or the first unselected ad and down to the bottom of the page or the first unselected ad.
Ctrl‐J
Command‐ J
Up and Down Fillers
Adds fillers and justifies up and down. Placement of fillers depends on setting in Justify Options.
Ctrl+Shift‐ J
Com‐ mand+ Shift‐j
Justify Options
Use to select where fillers used to justify the ads will be placed. Affects only Up and Down Fillers.
randomly‐‐throughout
at end‐‐of each column
To designate the placement of fillers when you choose Up and Down filler, choose Justify Options. The Justify Setup dialog box opens:
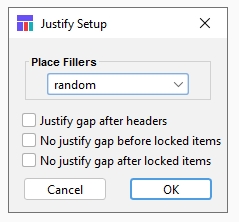
In the popup, do one of the following:
To have fillers added randomly throughout the ads to be justified, select random.
To have fillers added at the bottom of each column of ads to be justified, select at end.
Click OK. The dialog box and the Planning menu close. Note: This designates the behavior of Up and Down fillers in this plan for the entire site.
In the Plan menu, choose Planning -> Justify.
From the Justify menu, choose how you want the ads to be justified.
Packing ads
You can pack ads on a page to remove unwanted space.
To pack ads on a page
In the Plan, select the ads or one or more pages you want to pack.
In the Plan menu, choose Planning -> Pack.
An additional menu opens. Choose one of the following:
Up
Packs the ads up to the top of the page or the first unselected ad.
Alt+Shift‐U
Option+ Shift‐U
Down
Packs the ads down to the bottom of the page or the first unselected ad.
Alt+Shift‐D
Option+ Shift‐D
Swapping ad stacks between pages
You can swap the ad stacks between any two pages in a plan.
To swap the ad stacks between two pages
In the Plan, select one page and shift-click to select the other. Note: The pages can be in different page sets.
In the Plan menu, do one of the following:
Choose Pages -> Swap Pages.
Press Ctrl+Shift-W (Windows) or Command+Shift-W (Mac OS). The ad stacks on the two pages are swapped.
Mirroring an ad stack
You can mirror the stacking order of ads on a page. Mirroring causes the ads to be re-stacked with the pattern reversed either horizontally or vertically.
To mirror ads on a page
In the Plan, select the page you want to mirror.
In the Plan menu, choose Planning -> Mirror.
An additional menu opens. Choose one of the following:
Horizontal
Ads are reordered, with ads on the left moved to the right and ads on the right moved to the left.
Ctrl+Shift‐H
Command+Shift‐H
Vertical
Ads are reordered, with ads on the top moved to the bottom and ad on the bottom moved to the top.
Ctrl+Shift‐V
Command+Shift‐V
Floating an item
You can make an item float halfway to the top of the page. If it is narrower than the full width of the columns it occupies, it will also be centered within the space. For example, a one and one-half column ad would center in the two columns.
To float an item
Select the item on the page.
In the Plan menu, choose Planning -> Float.
The item floats halfway to the top of the page and is centered in the columns in which it was laid out.
Last updated
Was this helpful?