
Magnifying / Reducing the view in the layout window
In the Plan layout area, you can magnify or reduce your view of pages that appear in the layout window in several ways.
Zoom In / Out
To zoom in and out in the layout window
To zoom in, do one of the following:
Click the Zoom In icon (
 ). Click on a page. The view magnifies around the point you clicked. Continue clicking to continue to zoom in. Select the zoom in cursor again to turn off zooming.
Click and Drag and the view will zoom in on the point where you selected. It is important to lasso the area beginning within a page and encompassing the area you want to fill the window. Do not try to select outside the page or it won’t zoom in.
Choose View -> Zoom In.
Press Ctrl+ (Windows) or Command+ (Mac OS).
To zoom out, do one of the following:
Click the Zoom In icon (
 ). Hold down Ctrl (Windows) or Command (Mac OS) and click on a page. The view reduces around the point you clicked. Continue to click and the view continues to zoom out. To stop zooming, click the Zoom In icon (). The cursor returns to normal.
Choose View -> Zoom Out.
Press Ctrl- (minus) (Windows) or Command- (minus) (Mac OS).
View by Number of Spreads
You can designate the number of spreads you want to appear across the layout window.
Note: This option is disabled if you are viewing multiple products.
A spread is a pair of facing pages. For view purposes, the first and last pages in a plan each occupy the space of a spread.
Note: If you select a page, that page will remain within the view regardless of the number of spreads that appear in the layout window.
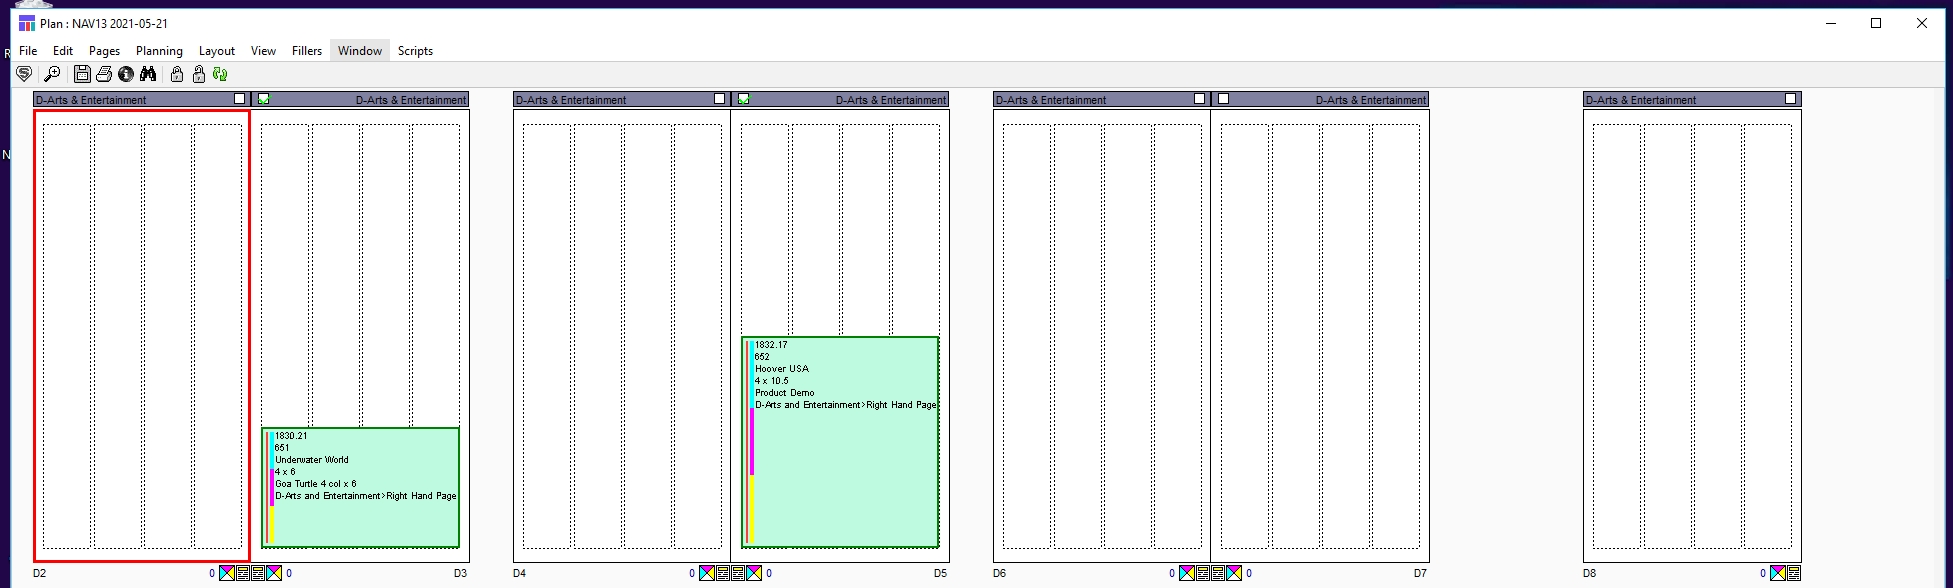
The below view has a spread setting of 2, meaning that in this view, two spreads are displayed across the layout window.

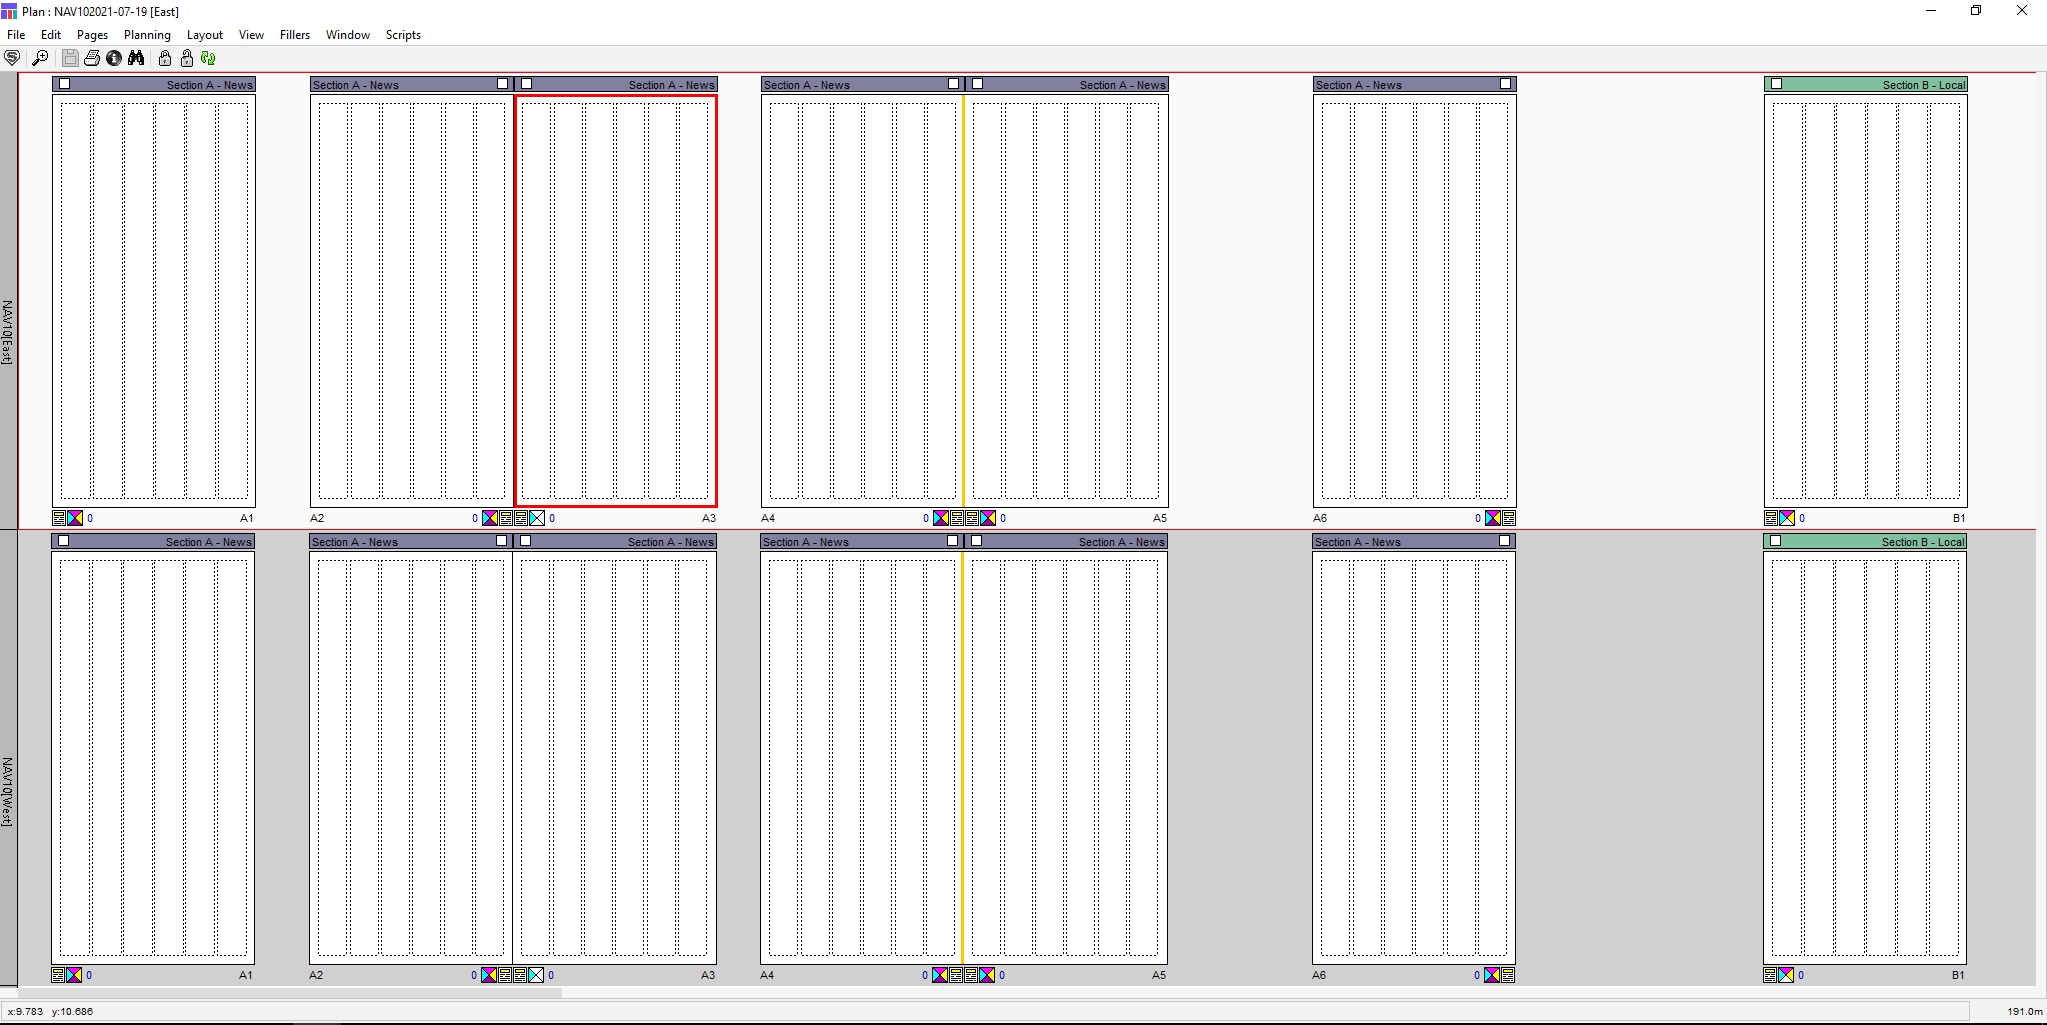
This view has a spread setting of 4, meaning that four spreads appear across each row of the layout window.
Do one of the following:
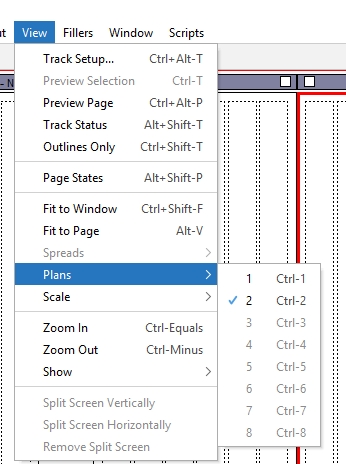
Choose View -> Spreads. The Spreads menu opens. Choose one of the options for the number of spreads you wish to view across the layout window.
Hold down Ctrl (Windows) or Command (Mac OS) and a keyboard number key (keypad numbers do not work) for the number of spreads you wish to view across the layout window.

1
Ctrl‐1
Command‐1
2
Ctrl‐2
Command‐2
3
Ctrl‐3
Command‐3
4
Ctrl‐4
Command‐4
5
Ctrl‐5
Command‐5
6
Ctrl‐6
Command‐6
7
Ctrl‐7
Command‐7
8
Ctrl‐8
Command‐8
9
Ctrl‐9
Command‐9
10
Alt-0
Option-0
11
Alt-1
Option-1
12
Alt-2
Option-2
13
Alt-3
Option-3
14
Alt-4
Option-4
Note: If you are viewing multiple products, these shortcuts affect the number of rows of editions that appear in the layout window.
The layout view changes. The spreads setting persists for the current session and applies to any additional plans you open.
Note: The size of the pages in the plan varies according to the width of the window. In other words, if you have reduced the width of the window, the pages will be smaller than they would appear in a wider window.
Fit to Page
You can quickly magnify or reduce a page to fill the layout window.
In the Plan layout, double-click in the info footer area below the page (in the space between the color indicator icon and the page number). The spread (page pair) changes size to fill the layout window.
Other options to Fit to Page
Choose View -> Fit to Page.
Press Alt-V (Windows) or Option-V (Mac OS).
The current Spreads setting is changed to 1
Scale Pages
To choose the scale at which you want to see the pages in the layout window, you can select the following:
Choose View -> Scale.
The Scale menu opens. Available scales are 200%, 100%, 75%, 50%, 25%, and 10%.
Choose the scale for the display.
The layout changes to the scale you selected.
Return to Spread View
With a single edition open, after zooming in/out of the view using the zoom or scale functions from above, you can return to a view of the number of spreads you had previously designated.
Do one of the following:
Choose View -> Fit to Window.
Press Ctrl+Shift-F (Windows) or Command+Shift-F (Mac OS). The view returns to the number of spreads you have designated.
Note: If you have multiple editions open, there is no spreads setting and this is disabled.
View by Number of Plans
When you have simultaneously opened plans for more than one product, you can change the number of rows displayed across the Plan layout window. See Working with multiple products (Editions/Zones).
Note: This option is disabled if you are not viewing multiple products.
This view has a plans setting of 2, meaning that in this view two rows of edition plans are displayed in the layout widow.
Note: When you launch Naviga Plan, the default plans display setting is 1
Do one of the following:
Choose View -> Plans. The Plans menu opens. Choose one of the options for the number of rows of editions you wish to view in the layout window.
Hold down Ctrl (Windows) or Command (Mac OS) and a keyboard number key (keypad numbers do not work) for the number of rows of editions you wish to view in the layout window.
1
Ctrl‐1
Command‐1
2
Ctrl‐2
Command‐2
3
Ctrl‐3
Command‐3
4
Ctrl‐4
Command‐4
5
Ctrl‐5
Command‐5
6
Ctrl‐6
Command‐6
7
Ctrl‐7
Command‐7
8
Ctrl‐8
Command‐8
Note: If you are not viewing multiple editions, these shortcuts affect the number of spreads that appear in the layout window.
Note: The size of the pages in the plan varies according to the width of the window. In other words, if you have reduced the width of the window, the pages will be smaller than they would appear in a wider window.
Undo
To undo any changes in the layout window magnificationm you can return the layout window to previous magnifications by doing one of the following:
Choose Edit -> Undo.
Press Ctrl-Z (Windows) or Command-Z (Mac OS).
Repeat until you have returned to the magnification you want.
Was this helpful?