
Run Orders & Run Order Master
Run Order Master
A Run Order Master should have a one-to-one relationship to the product.
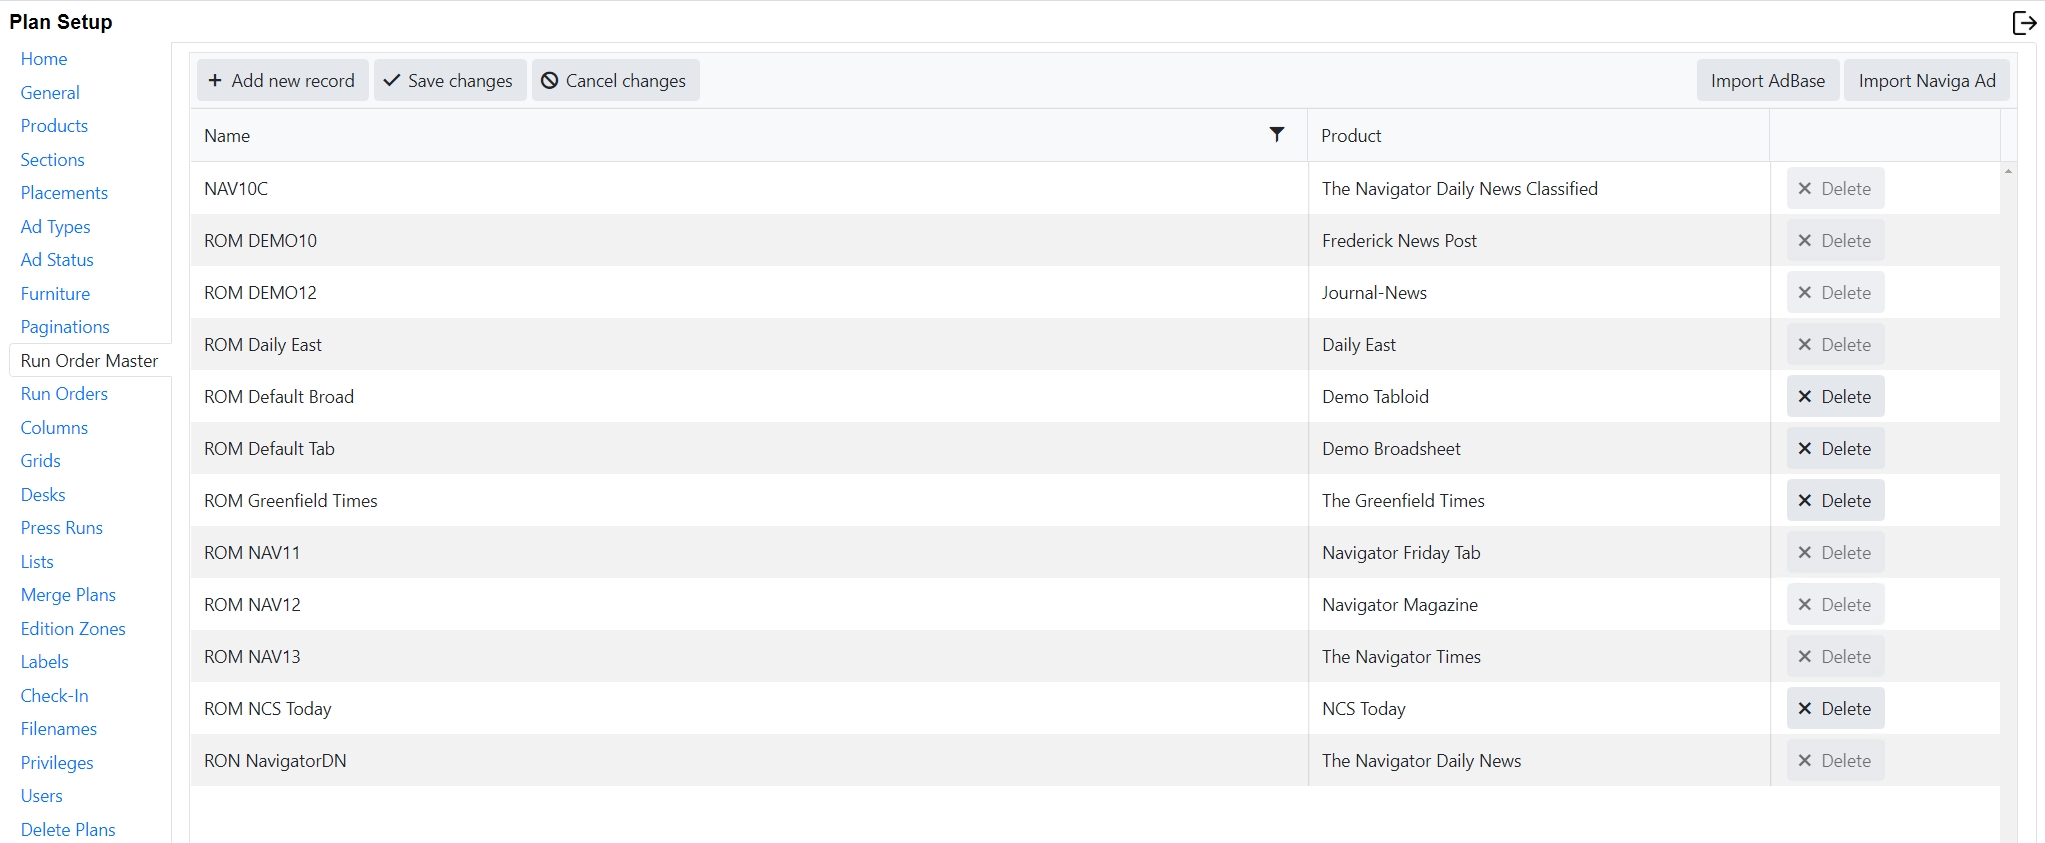
To create a run order master:
Select Add New Record at the top of the page
A blank Row will appear at the top of the list.

We recommend that you enter the Product Code in the Run order Master name field.
Link the product to the Run Order Master from the Product dropdown
Save Changes or click Cancel changes to exit without saving.
Click Import Naviga Ad or Import Adbase, depending on what system you are pulling data from. a. From Naviga Ad, this will import in for you all your sections, positions and categories and set them up as sections on the sections tab. It will also automatically add them to the run orders for this Run order Master. (See Run Orders below). When creating a new run order, it will likely be desirable to import both Display and Classified. When doing updates you may choose to only import updates from one or the other. Log to file option will save the output from the import to the Robot machine. It will be in the root folder (where Integration, setup, etc are running from) in the log/import sub-folder.
 Note that Options is grayed out. To enable it - on the previous screen, hold down the option menu and then click Import Naviga Ad. USE THIS WITH CAUTION!! It is very powerful and you can really mess things up if you are not careful. Use in conjunction with help from naviga support if you are uncertain, or try in your test database first.
Options menu will display 3 choices: Tidy Run Orders, Tidy Sections, and Clear & Upload. The two Tidy options will remove any sections and run orders which are not used in a template. Clear & Uplad will remove ALL Sections, Positions, and Categories for the selected Run order Master. Then the user can re-import them. This is really for a starting over type situation - like you decided to rename all your sections and positions and you want a clean slate.
b. From Adbase, this will import in for you, all your placements, positions, level 3 and level 4 items and will create sections in Naviga Plan Setup for them. It will also link these sections to the Run orders for this Run order Master
Note that Options is grayed out. To enable it - on the previous screen, hold down the option menu and then click Import Naviga Ad. USE THIS WITH CAUTION!! It is very powerful and you can really mess things up if you are not careful. Use in conjunction with help from naviga support if you are uncertain, or try in your test database first.
Options menu will display 3 choices: Tidy Run Orders, Tidy Sections, and Clear & Upload. The two Tidy options will remove any sections and run orders which are not used in a template. Clear & Uplad will remove ALL Sections, Positions, and Categories for the selected Run order Master. Then the user can re-import them. This is really for a starting over type situation - like you decided to rename all your sections and positions and you want a clean slate.
b. From Adbase, this will import in for you, all your placements, positions, level 3 and level 4 items and will create sections in Naviga Plan Setup for them. It will also link these sections to the Run orders for this Run order Master
A confirmation page will be displayed with the newly imported sections. This could be several pages long if there were a lot of sections. Click to the last page to confirm that no errors were reported.
Run Orders
The Run Orders screen has a dropdown on the left where you select the desired Run order Master. The column on the left has all available sections and the column on the right has the columns that have been selected for this run order master.
Normally, you will not need to do much manual configuration in here. The “Import” function on the Run order master will set all the sections for the product under the Display heading and it will import all the Classified Categories into the Classified heading. The important part that you will need to do manually here is to add a pagination rule to the Run Order. This can be done at the top level of Display or Classified, or it can be done further down if a particular section behaves differently than the others.
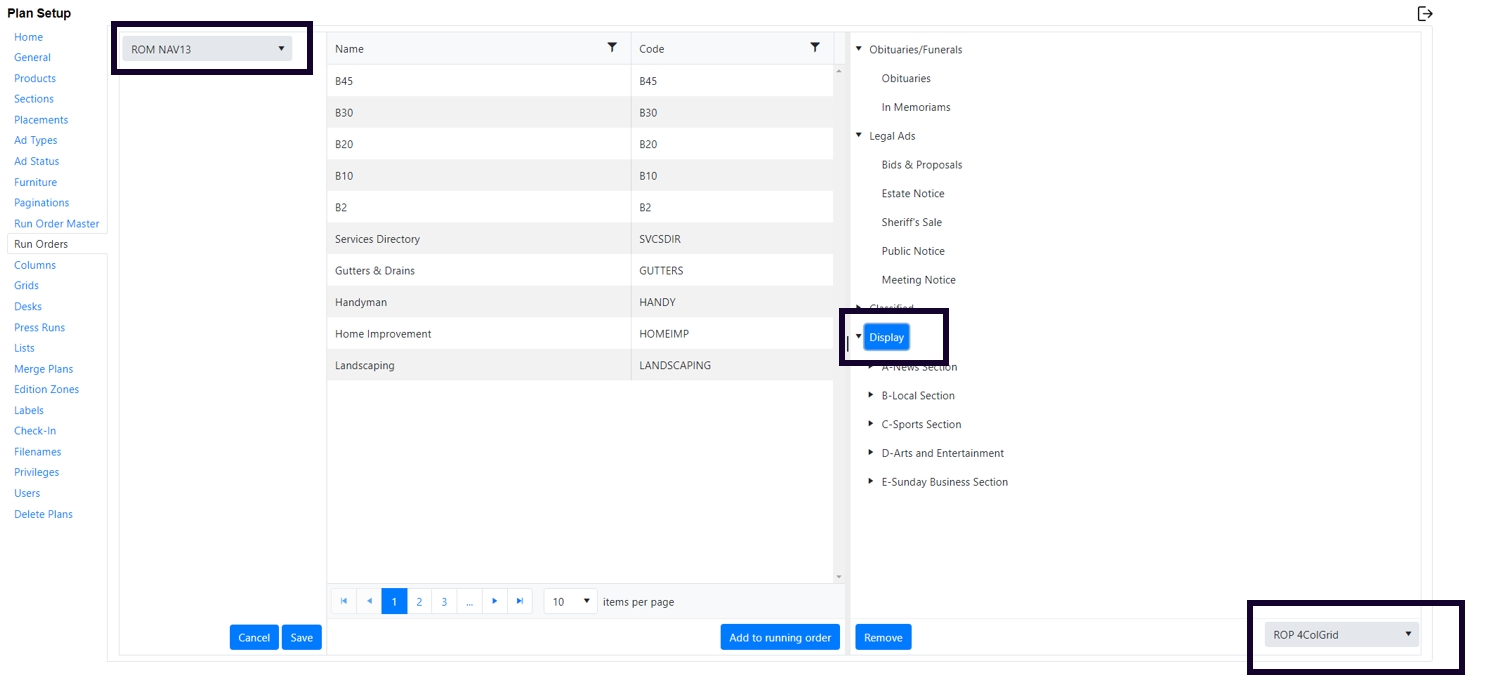
Attaching Pagination to the Running Order
Select the Run Order Master from the dropdown on the left.
On the right side, select the desired level.
On the bottom right, select the applicable Pagination setting.
Repeat for other sections, as necessary.
Click save on the bottom left.
To cancel without saving, click Cancel.
Adding sections to the Running order
If necessary, you can manually add sections to the running order. Select the desired section on the left and click “add to running order” to move it to the right column. Using drag and drop, move the added section to the desired location in the tree.
Removing Sections from the running order
If you no longer wish to have a particular section in the running order, select it and click “remove” at the bottom of the screen.
Moving sections within the running order
If you would like to change the placement of a section within the running order, select it, and drag and drop to the desired location in the tree.
Last updated
Was this helpful?