
Sections/Placements/Ad Types/ AdStatus
Sections
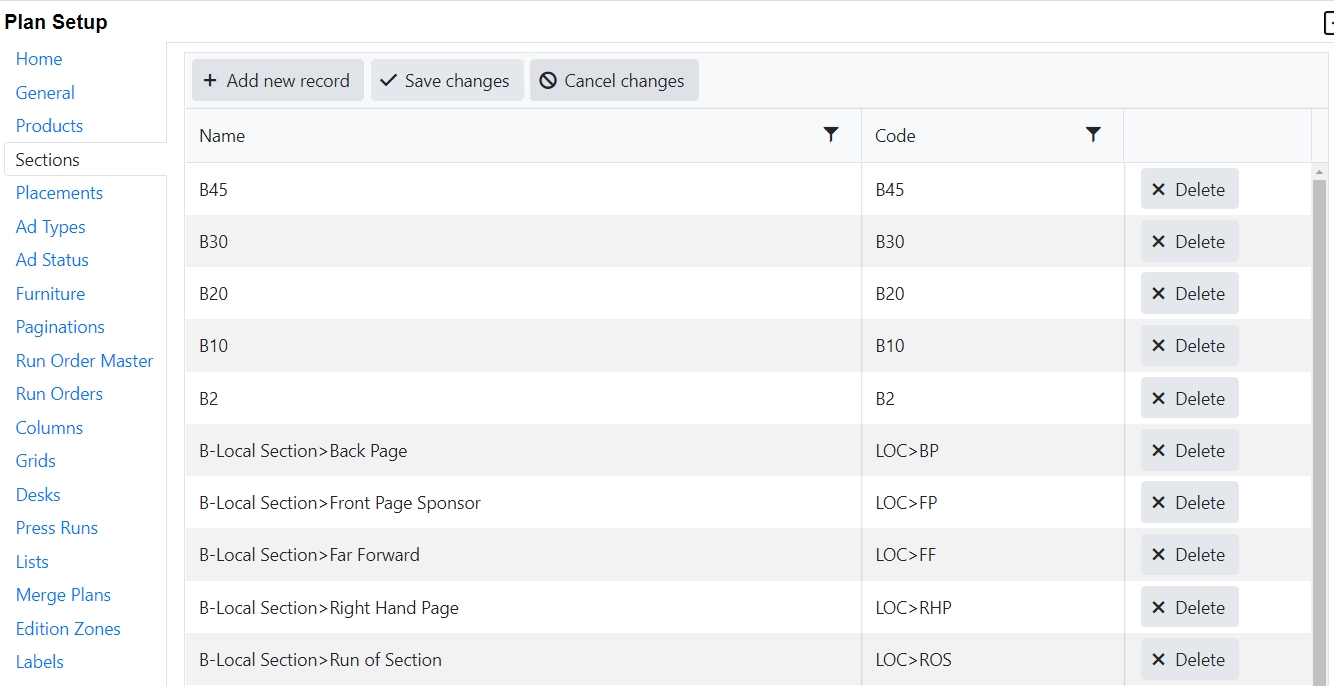
Sections are used to determine where in the plan an ad should be placed.
In Naviga Ad, Display ad orders are booked to Sections and/or Positions. Classified orders are created with Categories and subcategories. This all translates into Sections in Naviga Plan. For plan to be able to understand how many columns are in the ad, the ad coming from Naviga Ad must have a Section and/or Position if it is retail display or must have a Category if it is classified. You will get errors in plan if you don’t have that. If the publication is a magazine and doesn’t have sections, that is ok, as long as it has a position.
In NCS Advertising, Ads are booked to Placements and Positions. These also must link to a section within Naviga Plan. (See Placements below).
Under normal circumstances, Sections are not manually setup. They are imported into Naviga Plan when the Run Order Master is set up. (See Run Order Master).
If you need to manually add a section do the following:
Click Add new record.
Enter a name and a code. These must match the names and codes from the sending system.
Click save changes.
To cancel without saving, click Cancel changes.
If you have not used a Section and would like to remove it from the list, click delete on the appropriate line.
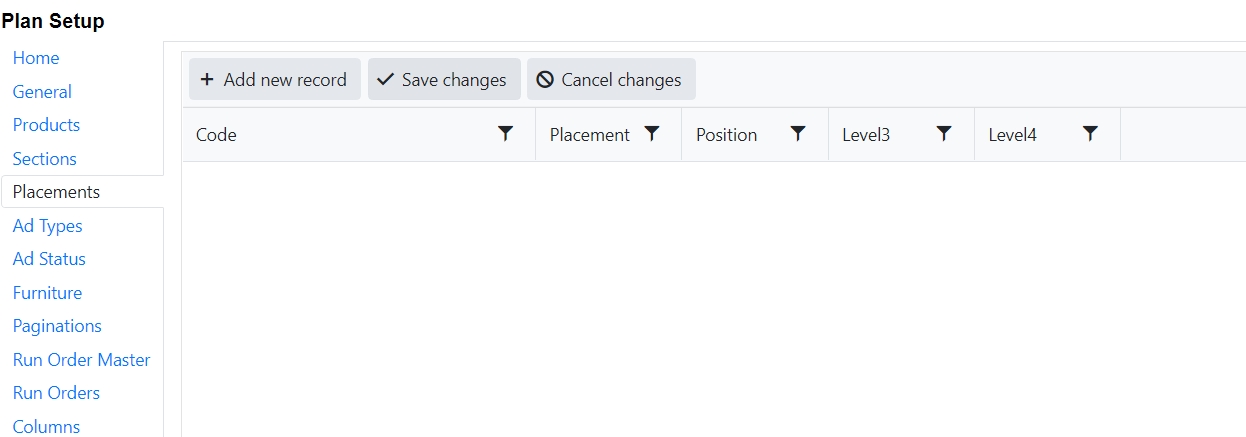
Placements
Placements are only used when NCS Advertising is the source system. This links the NCS Advertising Placement/Position/Level 3/Level 4 to a section in Naviga Plan.
Ad Types
Ad types tell Naviga Plan how to lay out the ads. An Ad type of D means it is a display ad and will stack. An Ad Type of L will be a liner ad which will flow.
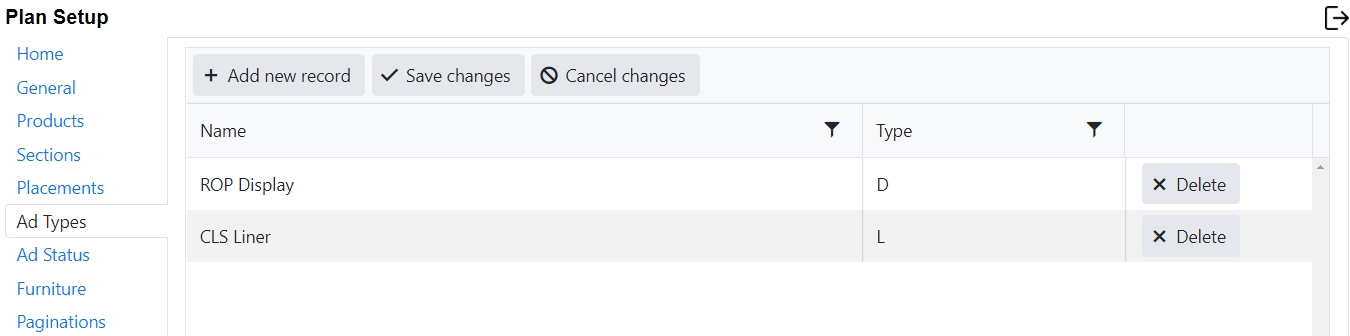
When connecting to a Naviga Ad system, the feed coming in simply indicates if it is a listing (liner) type or not. So, in a Naviga Ad environment, the default Ad Types of ROP Display and CLS Liner are sufficient.
If the source system is NCS Advertising, the actual Ad Type name is sent over in the feed from NCS Advertising, therefore Plan Setup will need all Ad Types to be setup along with a D or an L for the type to define if it is a Liner type or a Display type.
In an NCS Advertising implementation, do the following:
Click Add New record
Enter Ad Type name in the Name field. This must match the Ad Type coming in from NCS Advertising.
Enter a D or an L in the Type for each created ad type. D is for display type ads, L is for Liner type ads.
Click Save changes
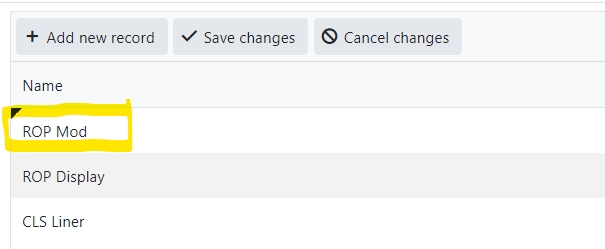
You can tell if there is an unsaved change if there is a black triangle in the corner of the record:
Ad Status
Ads coming from Naviga Ad will have a two-character code indicating the campaign status. The statuses that you choose to send to Naviga plan are configured in Naviga Plan Integration setup in the Naviga Ad system. At a minimum, you must set the following to be sent to Plan:

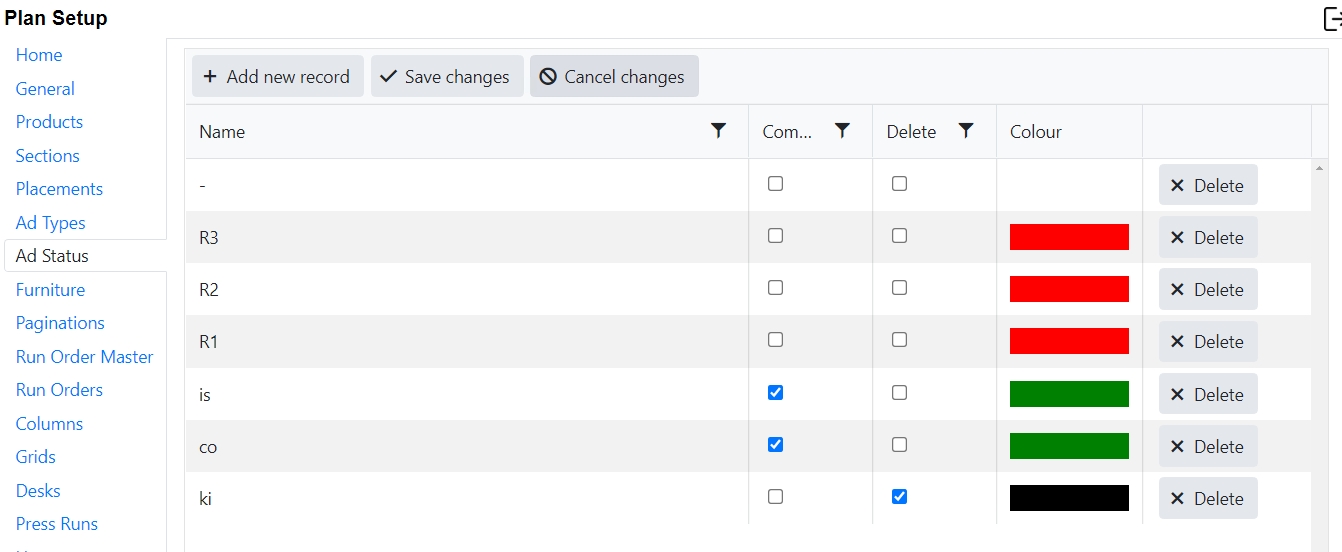
There are some default examples in the system. These can be deleted or changed, if desired.
To set up the desired statuses:
Click add new record.
Enter the two-character ID from the Naviga Ad Status Codes.
Click Save changes.
If the code is a completed status check completed.
If the code is a killed/deleted status click deleted.
Select the desired color code for the status.
Click Save changes.
Color codes selected here will be displayed in Naviga Plan in two places:
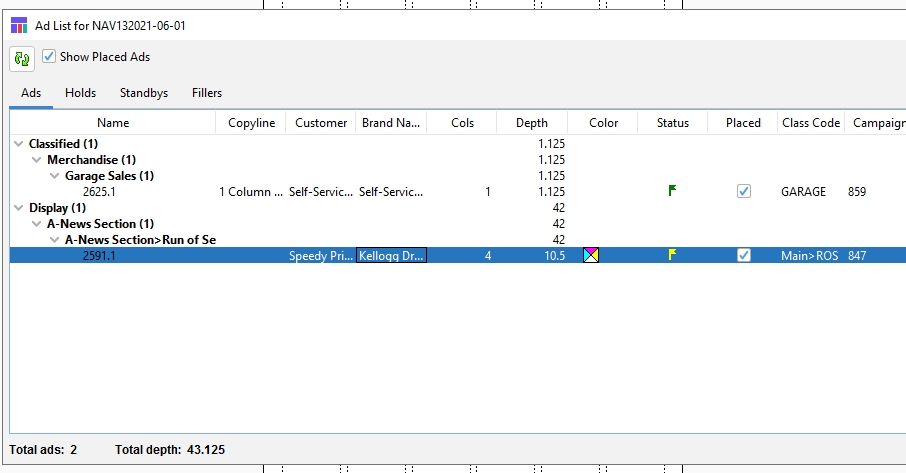
The “Status” field in the ad list will display a flag with the color of the status code:
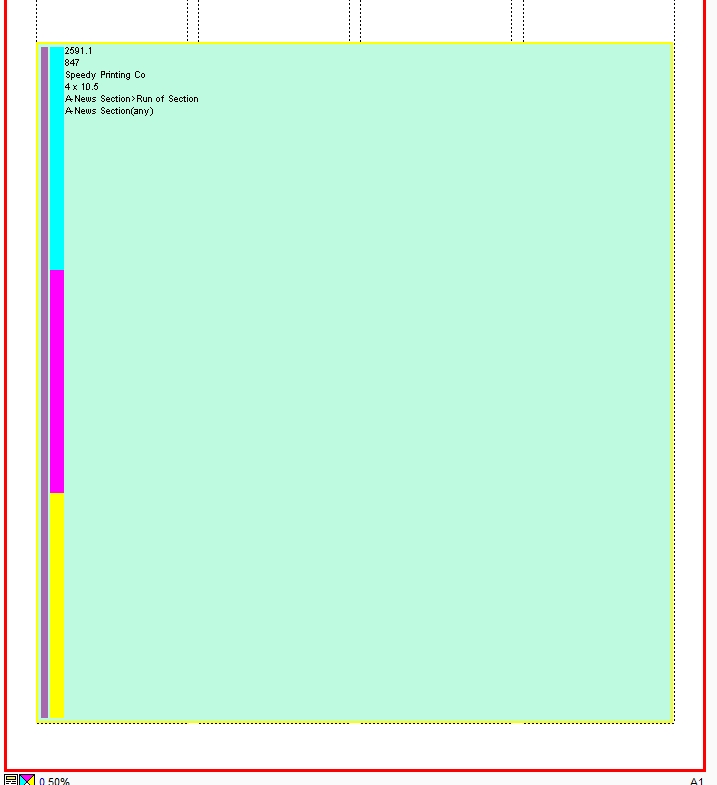
The ad itself will have a border around it in the color of the status. It is subtle, so best to use a bold color that will stand out against the color of the ad square (the below example has a yellow border).
Was this helpful?