
Print Page Dummies
You can print page dummies in the Plan.
Each dummy can contain a variety of elements. Dummies do not include editorial matter. They do include reserved spaces, including editorial reserved spaces.
Note: The system does not include reserved spaces when calculating ad space on a dummy page.
The items involved in printing page dummies include:
Elements: Items users can place on a page in the Plan, such as ads, fillers, headers, or reserved spaces. You can distinguish between these elements on the printed page by assigning each element type a pattern and, if desired, a color.
Dummy or dummy page: A printed representation of a Plan page, including any elements placed on that page. Each dummy has its own header (the dummy’s page set name) and can have a variety of information in its own footer. You can print more than one dummy on a single printed page.
Printed page: The page that comes out of your printer when you print dummies. A single printed page can contain more than one dummy, up to and including an entire plan, depending on the amount of detail and information you require.
Print profiles: You print dummies using print profiles. A print profile allows you to select how many dummies print on each printed page, to determine which information prints in each dummy’s footer, and to make other choices about the dummies’ appearance, such as grids and unit marks. You can add new print profiles or edit existing print profiles. Print profiles are available to all users.
Here is an example of a printed page using a profile set for one row and one column:
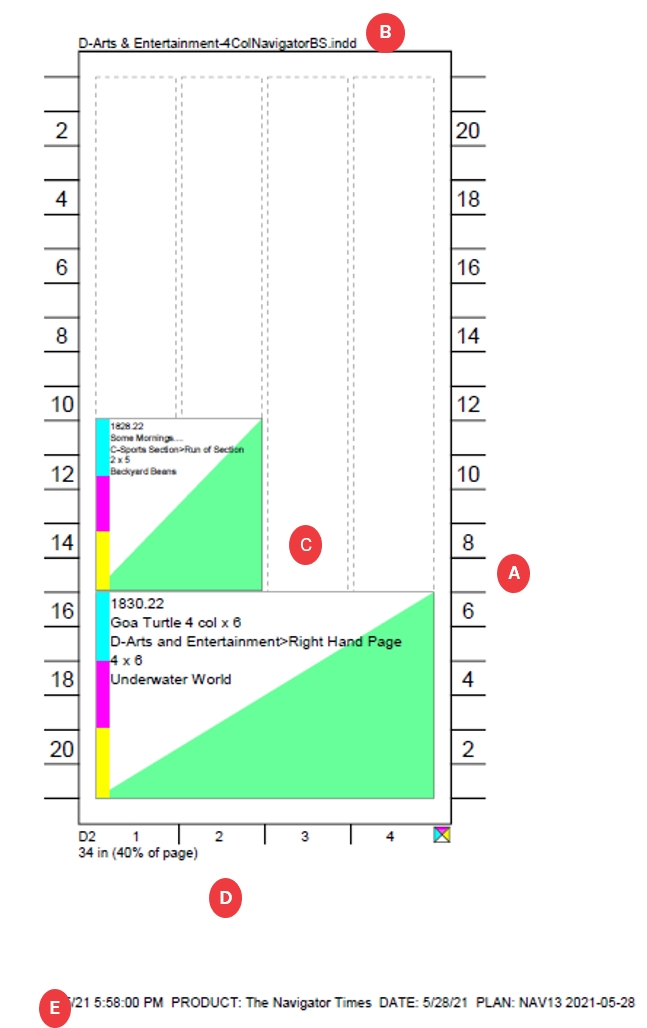
A – Unit Marks
C - Elements
E - Printed Page Footer
B – Dummy Header
D - Dummy Footer
Here is an example of a printed page using a profile set for four rows and four columns, with eight pages of a plan selected:
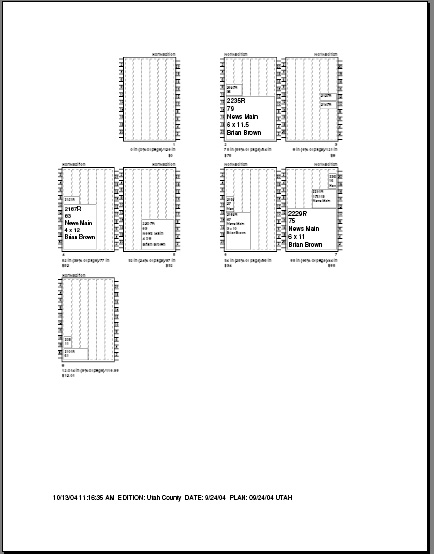
Note that there are only three rows of dummies, but they are sized as if there were four. This example does not have any pattern defined to distinguish between the elements like the first one does.
To print page dummies
In the Plan, choose File -> Page Setup.
In the Page Setup dialog box, set the paper size, orientation, and margins.
Click OK to close the Page Setup dialog box.
If you want to print dummies of only certain pages, select the pages.
Note: When you select only certain plan pages to print as dummies and print more than one dummy on each printed page, pages that are not paired in the Plan may appear to be paired on the printed pages.
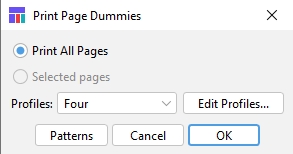
Print All Pages
Click to print all pages in the plan. Automatically clicked when you have selected no pages in the Plan (also, the Selected pages button is disabled).
Selected pages
Automatically clicked when you have selected pages in the Plan.
Profiles
Use to select the print profile.
Edit Profiles
Click to add or edit print profiles.
Patterns
Click to open the Patterns dialog, to select patterns and colors for the various element types. See Create patterns for the Dummy
Cancel
Cancels the changes and closes the dialog box.
OK
Closes the dialog box and opens the Print dialog box.
If you have not selected any pages, the Print All Pages button is selected. The Selected pages button is grayed out and cannot be selected.
If you have selected pages, the Selected Pages button is selected. To print all pages instead, click the Print All Pages button.
From the Profiles popup, select the print profile you want to print.
If you want to designate patterns and colors to apply to the various elements when they are printed, click the Patterns button.
Repeat as desired for any other element types.
Add or edit any print profiles you want.
In the Print Page Dummies dialog, click OK. If this is the first time you have printed a page dummy in this session, the Page Setup dialog box opens. After that, Plan assumes you are using the same setup. To change the settings again, choose File -> Page Setup.
Make any changes you want:
Select the paper size.
Click either Portrait or Landscape, depending on the number of dummy pages you are printing per printed page (as set in the print profile you have selected). For example, a print profile that calls for many columns of dummies—five or more—on each page, prints best in landscape mode.
Click OK. The Print dialog box opens.
Select a printer.
Click OK. The selected page dummies print.
Create patterns for the Dummy
To easily to distinguish between elements on the printed Dummy, you can set patterns for the different page elements.
Click the patterns button from the print page dummies dialog box.
The Pattern Selection dialog box opens.
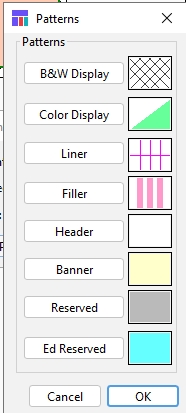
From the list of patterns select the element you wish to edit (ie. B&W Display, Color Display, etc)
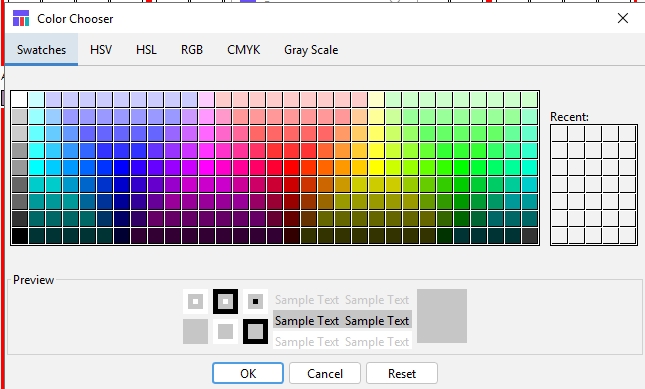
The pattern chooser will appear. To add color to a pattern, select the pattern and click Edit. The Color Chooser dialog box opens.
Select a tab—Swatches, HSB (Hue, Saturation and Brightness), RGB, or Gray Scale—double-click on a color, then click OK.
In the Pattern Chooser dialog box, click OK. In the Patterns dialog, the pattern and color you selected is visible next to the ad-type button. Note: You can assign only one pattern and one color to one element type at a time. You can select and appear to colorize other patterns while the Pattern Chooser dialog box is open, but only the pattern selected when you click OK retains its color.
 Note: The patterns and colors you choose apply to all plans you open until you change them.
Add or edit a print profile
You can add new print profiles or edit existing profiles for printing dummies. In these profiles, you can designate how many dummy pages will appear on each printed page, what information will appear in the footers for each dummy page, and what information appears in the element-types on each dummy page.
When you add a new print profile, it becomes available to all other users on your site.
Open the Print Page Dummies dialog box by doing one of the following:
In the Plan menu, choose File -> Print Page Dummies.
In the Plan, press Ctrl+Shift-P (Windows) or Command+Shift-P (Mac OS).
In the Plan, click the Print Pages icon (
 ).
The Print Page Dummies dialog box opens.
).
The Print Page Dummies dialog box opens.
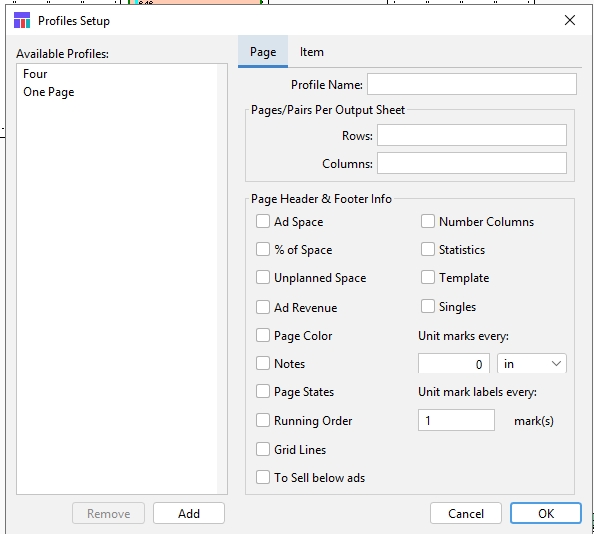
Click the Edit Profiles button. The Profiles Setup dialog box opens with the Page panel selected.
Available Profiles
A list of print profiles that have been set up.
Profile Name
The name of the selected profile. You can change it.
Pages/Pairs Per Output Sheet:
Rows
Enter the number of rows of dummies that will appear on each printed page.
Columns
Enter the number of columns of dummies that will appear on each printed page. (Each column is just one dummy page wide, thus a “spread,” or page pair, counts as two columns.)
Page Header & Footer Info:
Ad Space
Check to include in the printed footer for each dummy the total space occupied by ads on that dummy. (Does not include reserved spaces.)
% of Space
Check to include in the printed footer for each dummy the percentage of total space on the dummy currently occupied by ads. (Does not include reserved spaces.)
Unplanned Space
Check to include in the printed footer for each dummy the space on the dummy that does not contain ads. (This includes any space containing editorial matter.)
Ad Revenue
Check to include in the printed footer for each dummy the total revenue for all ads on that dummy. (Revenue is the total campaign revenue, which may not be the revenue for that one specific ad, unless the campaign has only one insertion on it)
Page Color
Check to include in the printed footer for each dummy an icon indicating the colors assigned to that page in the plan.
Notes
Check to include page notes in the printed footer for each dummy.
Running Order
Check to include the name of the page’s running order in the printed footer for each dummy.
Grid Lines
Check to include grid lines in each dummy.
To Sell below ads
Check to move spec ads or To Sell spaces to a hidden layer, below any scheduled ads placed in the same space, so that only the scheduled ads print on the dummy.
Number Columns
Check to number the columns on the printed page.
Unit marks every
Enter the spacing of unit marks on the sides of each dummy. 0 indicates no marks.
Measurement
Select the units of measurement for the unit marks.
Unit mark labels every
Enter which unit marks will be labeled: 1 will label every mark, 2 will label every other mark, and so forth.
Remove button
Click to remove the selected profile from the Profile list.
Add button
Click to add a profile to the Profile list.
Cancel button
Cancels the changes and closes the dialog box.
OK button
Saves the added and/or modified profiles.
Note: The unit of measurement used for many of the options in the Profiles Setup Page panel is set in Plan preferences. Choose Edit > Preferences and from the popup near the title bar, select Measurement Units. Select the measurement units you want and click OK.
In the Page panel, do one of the following:
To create a new profile, click Add. A profile named New is added to the Profile list. In the Name text box, change the name. The new name appears in the Profile list.
To edit an existing print profile, from the Profile list, select the name of the profile you want to edit.
In the Rows text box, enter the number of rows of page dummies you want to appear on each printed page. (The default is 1.)
In the Columns text box, enter the number of columns of page dummies you want to appear on each printed page. (The default is 1.) Columns are one dummy wide, so “spreads,” or page pairs (facing pages) count as two columns. Pages size themselves according to your settings of rows and columns, regardless of how many pages you select to print as dummies. For example, if you print just one dummy page—but use a print profile set to print four rows and four columns—that one page will print at the same size as it would if the printed page were filled with four rows and four columns of dummies. To print one full-page dummy per printed page, set your rows and columns to 1. Note: If too many dummies appear on a printed page, the system truncates dummy header and footer information. This may be especially true if you have included page notes in the dummy footer information.
To designate the information that you want included in the dummy footers, check the appropriate check boxes.
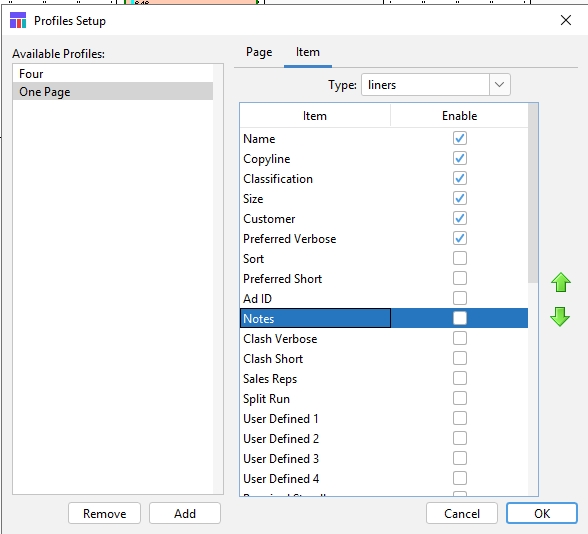
To open the Item panel, click the Item tab. The Item panel opens.
Available Profiles
A list of print profiles that have been set up.
Type
Select the element type: ads, display ads, fillers, headers, banners, reserved ad space, reserved ed space, reserved special space, reserved to-sell space, export liners, export display.
Item
A list of all information available to display in each element type.
Enable
Checked items will display.
![]()
Move Up icon
Click to move the selected item up in the list.
![]()
Move Down icon
Click to move the selected item down in the list.
Remove button
Click to remove the selected print profile from the Profile list.
Add button
Click to add a profile to the Profile list.
Cancel button
Cancels the changes and closes the dialog box.
OK button
Saves the modified profiles.
In the Type popup, select the type of item for which you want to designate information. The available information appears in the Information list.
Check the check boxes for information you want to appear in the various element types.
To move an information entry up or down in the list and in the element type, select the information entry and click the Move Up icon (
 ) or the Move Down icon (
 ).
).When you are finished, click OK.
Standard Footer Information:
Regardless of which check boxes are checked in the selected print profile, the following information appears in the header or footer for each dummy on a printed page:
Page set name (header)
Page number (footer)
Regardless of which check boxes are checked, the following information appears in the footer for each printed page:
Time and date of printing
Product
Run date
Plan name
Was this helpful?